
Jun 29, 2023 • Filed to: Photo/Video/Audio Solutions • Proven solutions
Do you want to know how to add special effects, like a blur, to images on your desktop PC? See this article on adding blur with the best apps available online.

Getting picture-perfect might require some skills, patience, and speed. What happens when it doesn’t turn out the way you expect – with flaws in the picture? Well, you are left with either trying all over again or concealing the imperfections. However, the ideal concealer is adding a blur effect, which makes the subject significant and reduces the visibility of flaws in the image.
People have different reasons for adding blur to their photos; however, not everyone knows what to do. With the right set of tools, i.e., advanced photo editors or software, you may achieve what you desire easily.
Adobe Photoshop is one of the easiest tools to come by but might be quite difficult to handle. Hence, there is a need to use other simpler alternatives. In this guide, you will see how to easily add blur to a photo on Mac or Windows Desktops using these alternatives.
What are the Ways to Add Blur to a Photo on Desktop PCs?
If you check online, there is a long list of accessible software options. Unfortunately, not every one of them is as incredible as they say they are.

Nevertheless, see some of the best options that deliver the perfect blur effect to a photo below.
Way 1: Luminar 4
A creative and easy way to add blur effects to your photo is using Luminar 4. It can deliver different series of blur effects, depending on how you want them. This photo editing tool performs the blur task in two different ways; (i.) direct blur on an image, and (ii.) masking tools on an image. The latter seems like a better way to get the result you want.
Luminar 4 also features an AI power tool, a smart way to identify/detect images and offer creative functions. Some of these functions include image enhancement, professional editing (contrast, gradient, split toning, dodge and burn, and filter), and clone and stamp.
On Luminar 4 blur effect function, there are three types of blurs – Soft focus, Soft focus Bright, and Soft Focus Bright.
Whichever you decide to use, depending on the lens effect and brightness, below is a step-by-step guide on how to blur on a desktop PC.
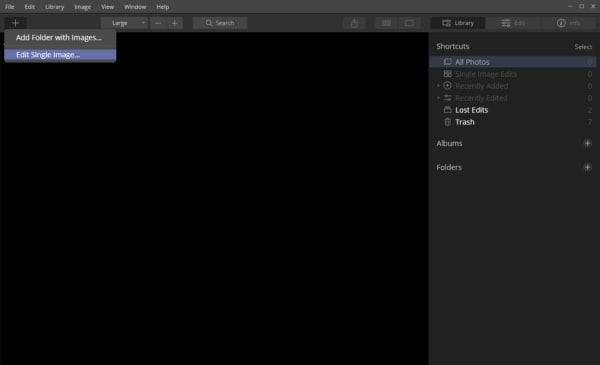
Step 1: Download and install the Luminar 4 app on your PC
Step 2: Launch the application and start to import photos (click “+”)
Step 3: Perform little edits (if you want to)
Step 3: Click on Creative and Select Glow
Step 4: Choose between the different types of blurs available (Soft Focus is recommended)
Step 5: Click on Edit Mask and then Radial Mask
Step 6: Draw a circle over the subject in the photo – the smaller circle is the focus point, while the part outside the large circle is the blur point.
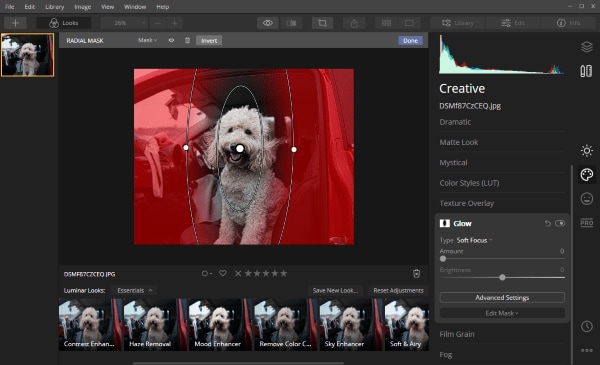
Step 7: Adjust the effect amount and add other enhancements, such as brightness, warmth, etc.
Step 8: Click on “Done”
Step 9: Save new blurred photo.
Way 2: Preview App
Another easy software to use for adding concealing effects to photo is the Preview App. It was solely designed for Apple MacOS, so windows PC would have to sit this one out. The app is a more sophisticated way of achieving a flaw-free and fully-enhanced image in the simplest possible way.
Step 1: Mac PC users are often advised to use Preview as a default app for opening pictures. So, if you haven’t, that is the first stage of learning how to add blur to a photo.
Step 2: Right-click on the photo and open with Preview App
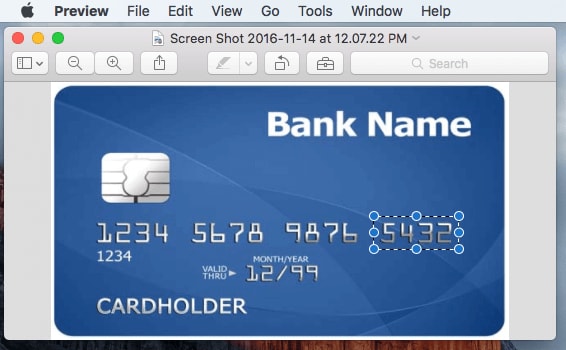
Step 3: With the image open in the app, move your cursor to the flawed area, then click and drag to select. With the area of interest in clear view, click on “Delete” on your keyboard.
Step 4: The deleted area is blurred out, leaving the subject in focus.
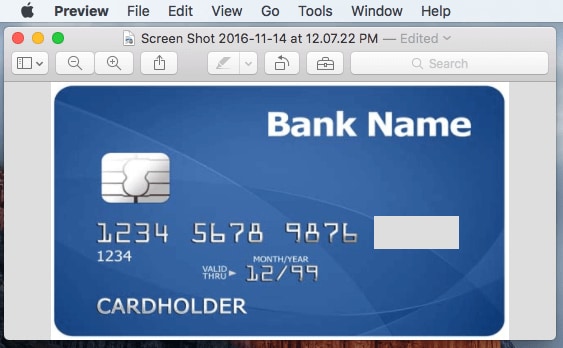
Step 5: Save the image.
The preview app isn’t always the best method for blurring, but it is the perfect concealer.
Way 3: Skitch
Evernote’s Skitch is another incredible app to pixelate an image, thus, concealing some features. It is also a free Mac app; it is not currently available for Windows PC. This application is stronger than Preview, so if you are looking for a better way to add effects, this might be the best choice.
Below is a guide on how to proceed with adding blur to a photo using this app.
Step 1: Download the Skitch app from Mac App Store or the Skitch official website.
Step 2: Install and Launch the app on your Mac computer
Step 3: Click on the Menu and select file to open access to media
Step 4: Select image and wait for it to load
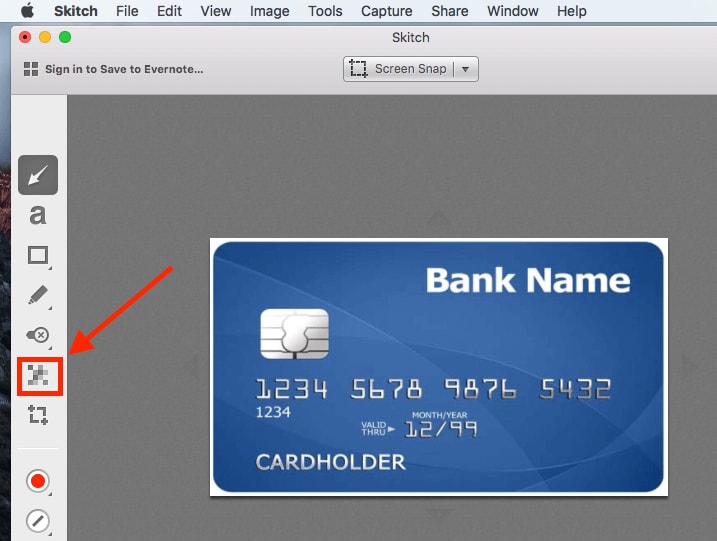
Step 5: Click on the Pixelate icon on the left bar of the app
Step 6: Left-click the area needed to be pixelated
Step 7: Release the click

Step 8: The pixelated area becomes blur immediately
Step 9: Repeat for other areas
Step 10: Export and Save photos.
Way 4: Snagit
A blur tool originally designed for Windows PC, but now available for MacOS also is the Snagit. Undoubtedly, it is one of the easiest choices to add blur effects to a photo, especially when editing screenshots.
Since the blur function is already available on the software, all you have to do is apply and save the image. Below is a step-by-step guide on how to get started.
Step 1: Download Snagit software for Windows or Mac PC on the TechSmith site
Step 2: Install and Launch the software for image editing
Step 3: Drag the image to the empty workbox
Step 4: Click on “More” at the upper bar
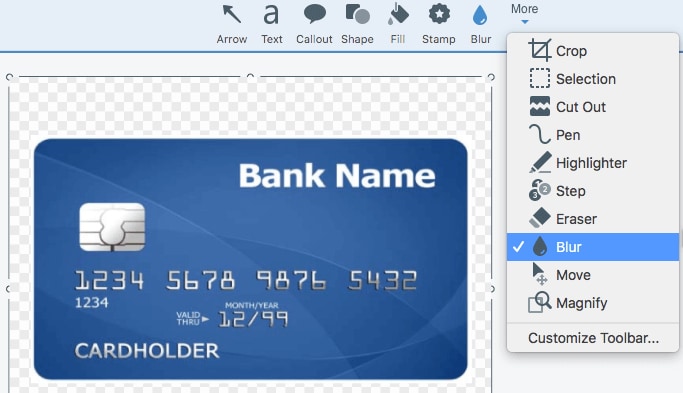
Step 5: Select the “Blur” function
Step 6: With the cursor, mark the area you want to blur out
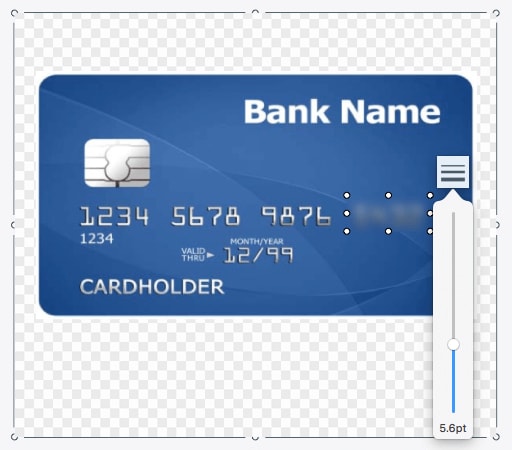
Step 7: Release the cursor and immediately see the blur effect.
With Snagit, you can adjust the degree of blur depending on how you want your photo is turn out to be.
Way 5: Blur Photo Square
A free, advanced photo editor that will run on both Windows and Mac OS computers is the Blur Photo Square. While there is a special preference for the type of Windows it can work on (i.e., 10 32bit and 64bit), it works perfectly on Mac.
Blur Photo Square is somewhat the perfect and the most dependable android emulator – the likes of BlueStacks and NOX APK Player. However, it is not a crop tool but a creative, blur, background maker. With this editing tool, you can add multi-layered blur frames so that the blur radius is as expected.
Amazingly, this photo editor app delivers top-quality square-sized photos so that users can post on social media platforms like Instagram. Overall, it is a user-friendly app with several features.
Here is how to use the Blur Photo Square software application.
Step 1: Download Emulators for Windows and Mac OS PC
Step 2: Launch the Emulators on your personal computer and open with Google Account
Step 3: Download Blur Photo Square Editor on Play Store or App Store
Step 4: Install and Launch the software application on the Emulator
Step 5: Select a photo from a gallery or phone camera
Step 6: Adjust the size of the photo to a perfect square, suitable for blur effect
Step 7: Choose from the different blur shapes, one suitable for the squared photo
Step 8: On the menu, click on “Pip Photo Frames” to finally enhance the blur effect on the photo
Step 9: Click Finish, and save the image to the gallery.
Way 6: Focus & Blur Photo Editor
One more great tool suitable for Mac desktop users is the Focus & Blur Photo Editor. Apart from adding a blur effect to an image, it allows for creativity so that depth of field and visual effects is professional-quality. The tool has some of the best features – in adjustments and highlighting.
Below is a guide on how to use Focus & Blur Photo Editor.
Step 1: Download, Install and Launch the Photo Editor from App Store to your Mac computer
Step 2: On the clean interface with several adjustment tools and features, add or drag a photo to be edited
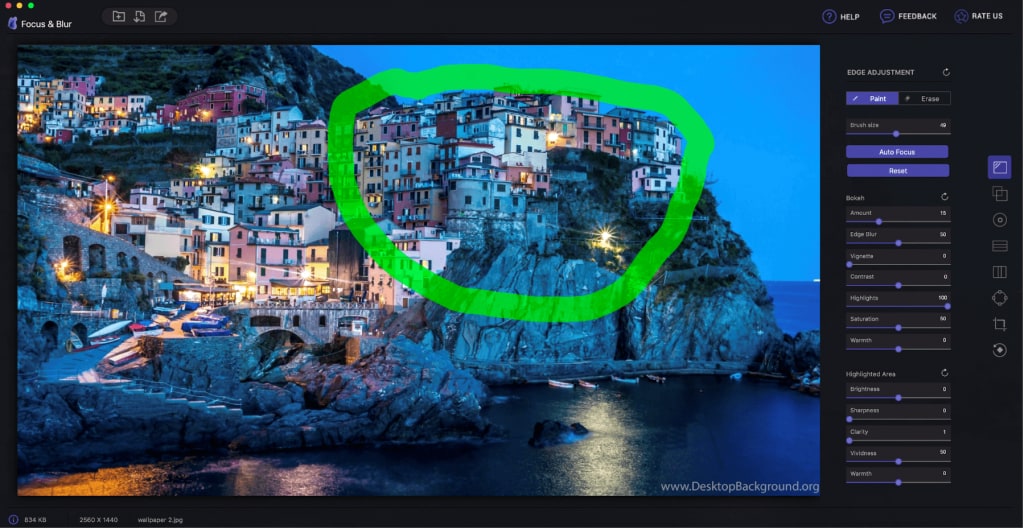
Step 3: Choose from the different adjustment features for creating blur effects – Overlay, Edge, Circular, Vertical, Horizontal, and Custom Adjustment
Step 4: Improve the pictures with highlights
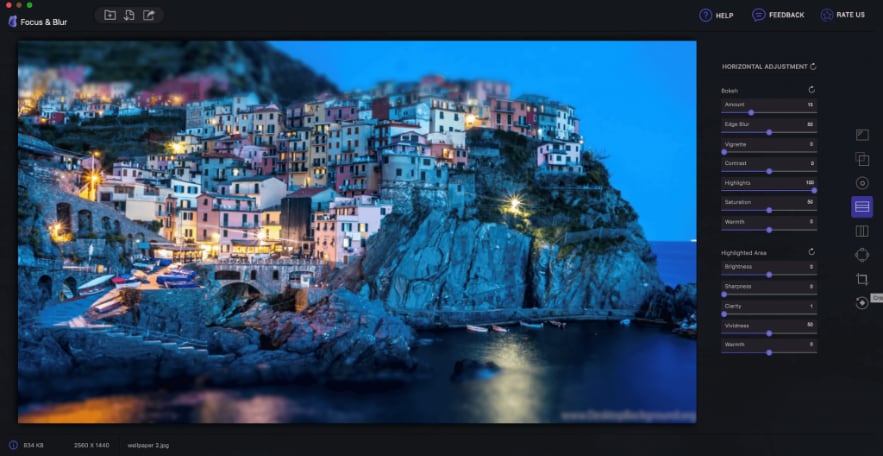
Step 5: You should have added blur effects and highlights to the photo by now, so save the work. Set the quality of the image to the highest.
Conclusion
Photo editing is a creative thing because it allows you to explore different features/tools without having prior knowledge. At first, it may seem like you don’t know what you’re doing; however, you begin to get the hang of it subsequent times and can finally start editing professionally.
In this article, adding blur effects to a photo is a must-know because only then can you conceal flaws in an image. There are more than just these tools reviewed above. Hence, it would help if you explored the different advanced editors, you come across for adding blurs on Windows or Mac desktops.


Theo Lucia
chief Editor