
Jun 29, 2023 • Filed to: Photo/Video/Audio Solutions • Proven solutions
Photo editing can be a great way to add that extra bit of flair to your photos. One of the most fundamental features of the human face is the eyes, and modern software allows you to change your eye color to your heart’s content. Whether you want to test out new colors for contact lenses, remove red-eye from a photo or add special color effects to the eyes, you can change it all with today’s powerful software.
Modern software makes use of complicated algorithms and some even use AI to change your eye color as natural as possible. In most cases, it can be impossible to decipher the edited from the original. Today we will be counting down our picks for the best eye-changing software available on the market. We will also teach you how to change your eye color through these applications. So, buckle up, and let’s begin!
Method 1: Using an Online Tool - Sketch and Color
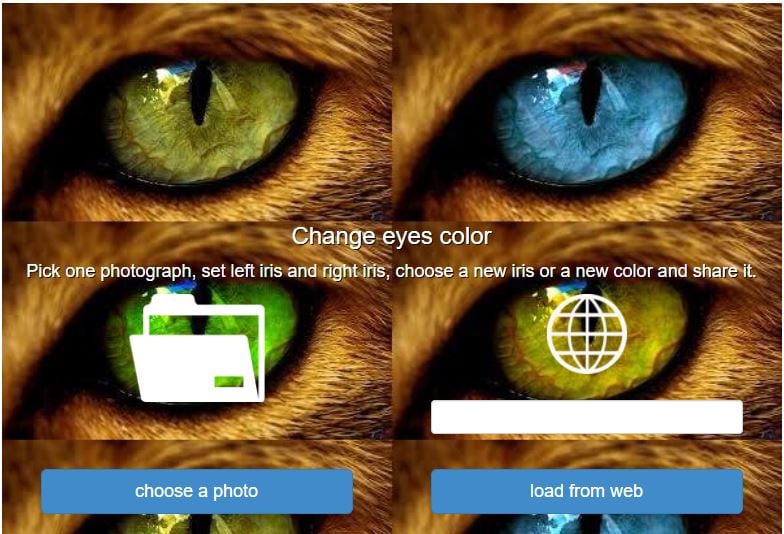
SketchAndColor.org is a free-to-use website with a clean and robust interface. The online editor ensures it provides a bloat-free interface to the user by getting rid of additional features and keeping the design minimal. Most other online editors will bombard you with features like adding a filter, changing saturation, etc. This slows down your browser and makes it impossible to do the task you want to do. Sketch and Color have kept its system swift by only providing you a powerful way to change your eye colors and getting rid of the fussy stuff that other online editors offer.
Following are the ways to change your eyes’ colors in Sketch and Color:
Step 1: On the home page, you can upload your image by clicking on the “Choose a Photo” option. Alternatively, you can copy and paste the URL of an image on the web and click on “Load from Web”.
Step 2: Now you will be presented with a new window with two options “Set left iris” and “Set right iris”. If the image is rotated the wrong way upon upload, you can also use the “Rotate” option to change the rotation.

Step 3: Click on the “Set left iris” button. A guiding cursor will appear representing an eye. Use the “scale” bar to zoom into the image. Set the guiding cursor on your left iris by dragging your mouse over the image. Use the green and blue orbs of the guiding cursor to fine-tune.
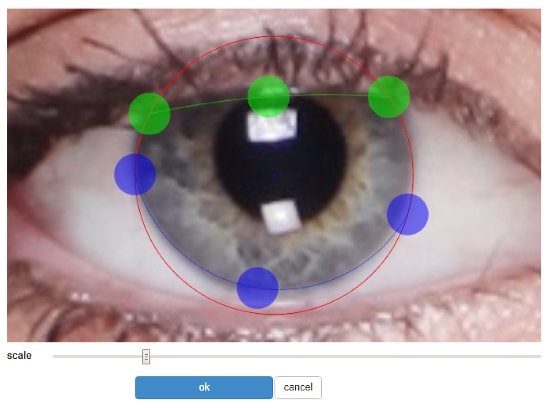
Step 4: Click on the done button. Repeat the same steps for the right eye. You can also choose to change the color of a single eye. Now click on the “Set Color” option and choose from the color pallet. You can also choose from a bunch of different styles available on the tab on the right.
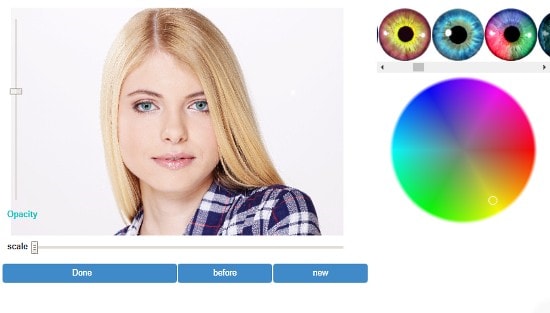
Step 5: Use the opacity slider on the left to set the opacity of the color. Now click on “Done”. A new window will pop up. Click on the “Download” button to save the image.
Method 2: Using an Image Editor - PhotoWorks
If you are someone who simply needs to edit your eyes without diving into the complexities of photo-editing then PhotoWorks is the perfect tool for you. Many popular photo editors have features you can use to change eye color but for a beginner, the software can be tough to operate on. PhotoWorks offers a simpler solution to this problem by automating the complicated stuff and leaving you with a robust and minimal interface. Unlike the online editors where features have to be limited to keep the webpage fast, software editors have no such limitations. Apart from changing your eye color, you can also apply one-click filters, change the size of the nose and mouth, and much more. It is the go-to tool if you want a quick way to edit your pictures.
You can follow these steps to change your eyes’ colors on PhotoWorks:
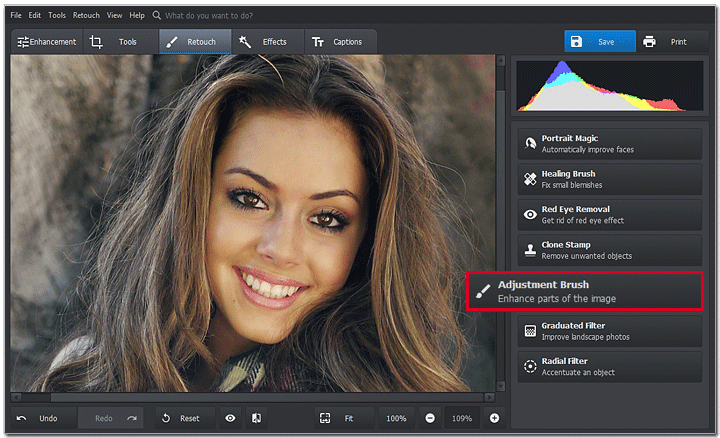
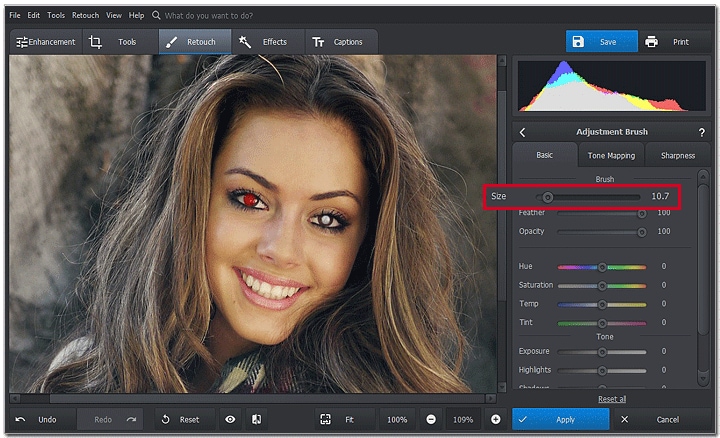
Step 1: Click on the Retouch tab and choose the “Adjustment Brush” from the list of tools.
Step 2: Adjust the size of the brush from the “Size” slider on the right and carefully paint the iris on your photo. This will select the area you have painted.
Step 3: Use the “Hue” slider from the “Basic” tab on the right. Experiment with the different options until you get the color of your choice. You can also use the “Saturation” slider to tune the colors to your satisfaction.
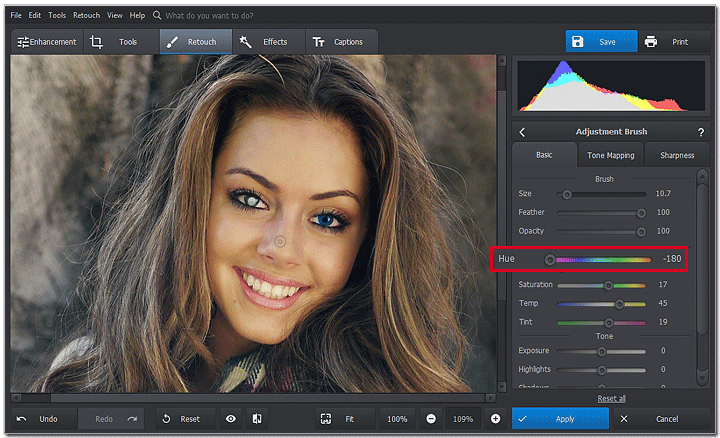
Step 4: Use the other sliders e.g., “Exposure”, “Highlights”, “Shadows” etc., to smoothen the colors and make the image look natural.
Step 5: Repeat the steps for the other eye too.
You can now save your image or edit it some more.
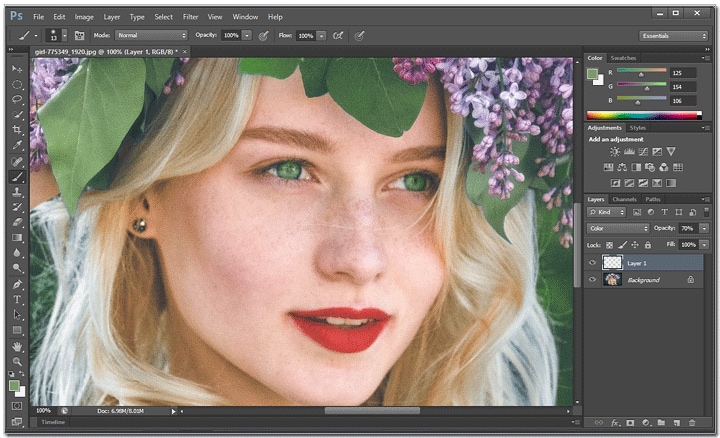
Method 3: Using Photoshop
Photoshop is the most powerful and popular photo editing tool in the world. There is nothing you cannot do with photoshop when it comes to photo editing. Professional graphics designers and digital artists use the powerful mechanisms of Photoshop to create beautiful and mesmerizing art. Photoshop can be a bit complicated for beginners but the precision and control it offers over your photos remain unrivaled. There are also many ways you can get paid if you know how to use Photoshop properly. There are many different ways you can use to change eye color in Photoshop. We have presented a straightforward way to do this without complicating things too much.
Following is the steps to change eyes’ colors in Photoshop:
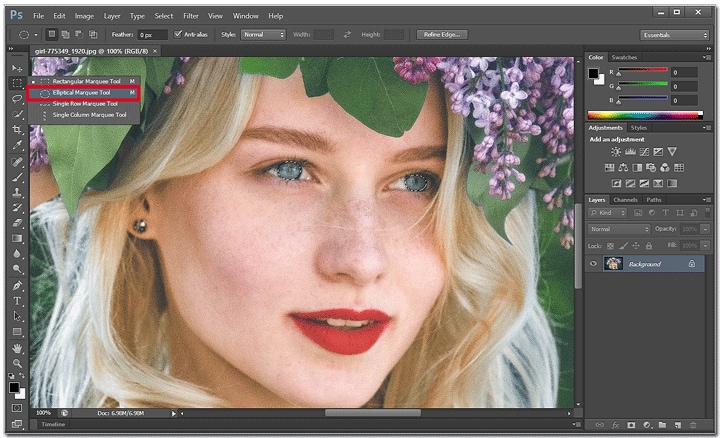
Step 1: On the left hand of the window choose the “Marquee” tool from the toolbox. Make sure you open the drop-down box of the “Marquee” tool and choose the “Elliptical Marquee tool” option. You can hover over the icons to read the name of the tool if you have trouble finding it.
Step 2: Use the Marquee tool to select the left eye, then hold the shift key and select the right eye as well.
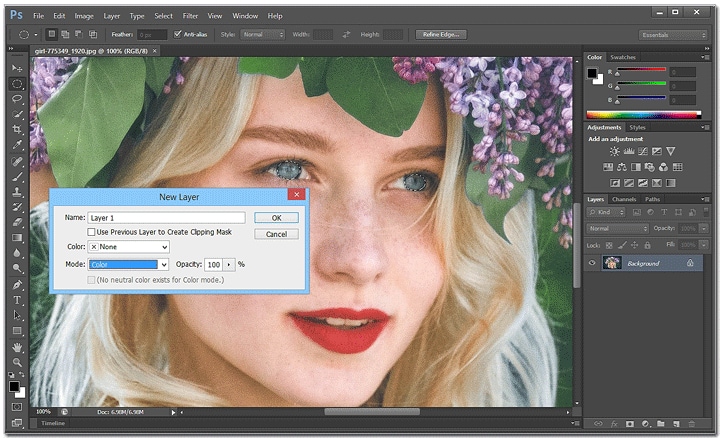
Step 3: Now create a new layer by pressing Ctrl + Shift + N. Alternatively, you can go to Layer -> Add New Layer. Make sure you set the mode to “Color”.
Step 4: Use the regular brush over the selected areas to color the eyes. You can change the saturation of the color by increasing or reducing the opacity of the layer.
You can now save the image or edit some more.
Method 4: Using a Mobile App - Eye Color Studio
In this rapidly advancing world, technology is getting smaller and smarter. Nowadays, many users edit their pictures on their mobile phones. Mobile phones have also eliminated the need for heavy camera equipment. You can now click a spectacular photo from your phone’s camera and edit it on the go. There are hundreds of photo editing tools available. For this guide, we will be using the Eye Color Studio app by ModiFace. It offers a few dozen eye styles to choose from including Intense, Marble, Golden, Electric, and many more. You can unlock more styles by buying the paid version. The app uses augmented reality to automatically detect the eyes. You can then fine-tune the selection by adjusting with your fingers.
Following are the steps to change eyes’ colors on Eye Color Studio.
Step 1: Click on the “New Photo” button and then choose the Gallery option. You can also choose the “Camera” option to take a photo on the spot or check the other options depending on where the image is.
Step 2: Select the image you want to edit. The image will now open and the app will automatically select the eyes and zoom in. Use your fingers to adjust the circle on the eyes. You can also use the Brightness and Contrast slider at the bottom to change the brightness and contrast of the image respectively.
Step 3: Click on the “Next” button to go to the iris selection option. Set the guiding orb on your iris. Use the slider on the right to change the size of the orb.
Step 4: Click on “Next” again and repeat the steps for the other eye.
Step 5: Now choose from the different styles available. Alternatively, you can click on the “Create” option and create a new eye style by setting the color yourself. Change the opacity of the new style using the slider on the right.
Step 5: You can click on Mode to set whether you want to change the color on both eyes or a single one.
Step 6: Click on the finalize option and save your photo.
Conclusion:
Editing photos may seem an intimidating task to many people. Furthermore, if you are a beginner, you will only have dreamt about changing the eye colors on a photo. Hopefully, after this article, you will have realized that you don’t need to be a computer scientist to edit photos. All you need is powerful software. The software on this list all have their outstanding features some let you change eye color without downloading an app while others offer great precision when editing. We hope these suggestions were useful to you and you learned something new from this article. Have a great day!


Theo Lucia
chief Editor