
When it comes to data storage, data management helps you make the most of your resources. It is best to have specific storage spaces that cater to different data types. It calls for creating disk partitions with a single drive with a high capacity instead of purchasing several smaller storage devices.
Still, you may need to copy the partition to another drive to accommodate more data or create backups if you have multiple drives. That’s where partition cloning comes into play. Throughout this piece, you’ll learn all about it and the best partition cloning software for Windows 10/11.
Part 1. What Does Partition Cloning Mean?
A clone partition is a copy of another division on the same system that shares the same size and configuration. It even has the same data as the original partition when it was copied. Clone partitions free of damaged sectors and viruses can help create backups without involving online services or external backup drives.
Moreover, you can clone partitions from your hard drive to your SSD and vice versa. That allows you better flexibility as the hard drives can retain the data for longer, and the SSDs are highly resilient to shocks and vibrations.
Part 2. Does Windows 10/11 Have a Partition Cloning Feature?
No. Windows 10 and Windows 11 only offer you to create a System Image of any current drive on another disk so that you can restore your system progress in the event of a data loss. As of 2022, there is no default feature to copy a partition, sector-by-sector, to another drive on Windows. However, you can do it with the assistance of appropriate third-party software.
Part 3. The Best Free Partition Cloning Software - AOMEI Partition Assistant Standard
There are many programs available online that you can use to clone partitions to SSD or HDD, depending on your preference. But with the extensive choices comes the hazard of running into a program that isn't compatible with most systems or contains malware. If you're looking for the ideal clone partition software, then AOMEI Partition Assistant fits the bill. It enables you to create partitions with FAT12/16/32, Ext2/Ext3/Ext4, NTFS, and exFAT file systems. In addition, you can use it for all Windows versions past XP.
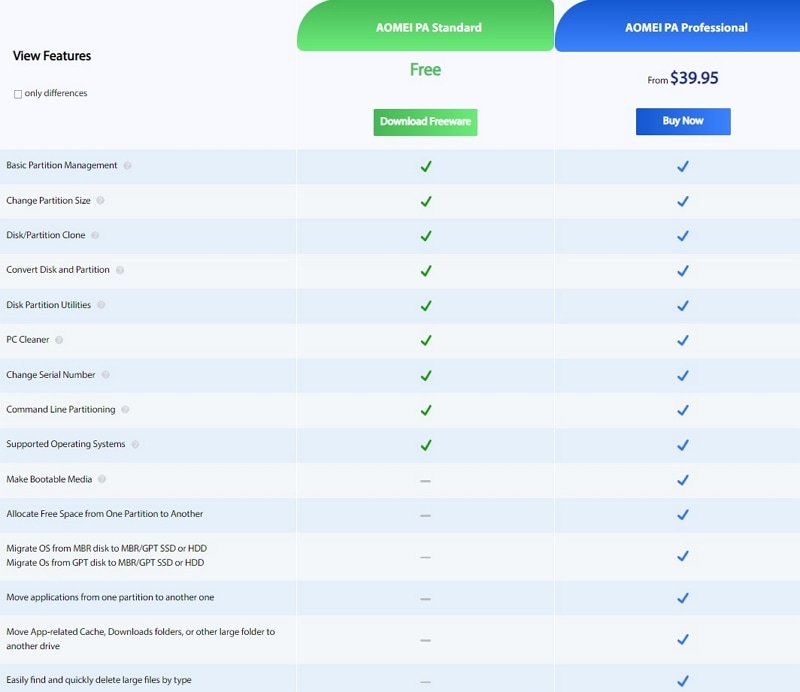
The AOMEI Partition Assistant is an all-inclusive tool to help you easily manage all storage-related functions on your PC. Even with the Standard edition, you get plenty of valuable features like configuring the file system and creating bootable media from removable drives. However, upgrading to the Professional Edition offers you more options, such as transferring applications from one partition to another, a secure erase wizard and converting boot systems between MBR and GPT styles.
As a flexible partition cloning software, you can use AOMEI to:
- Clone system/data partition to SSD/HDD
- Clone partition with corrupted or bad sectors
- Clone primary partition or logical partition that contains the primary OS for the system
AOMEI Partition Assistant Standard lets you clone partitions in two separate ways:
Partition Cloning Types |
Explanation |
| File-by-File Copy | It is the fastest method to clone a partition using AOMEI. With it, you only copy all existing files to the new drive. Therefore, it doesn't affect the new storage space, and you can't recover any corrupted or lost files from it. |
| Sector-by-Sector Copy | Although slower, a sector-by-sector copy clones all available files and their images from the source to the destination disk. You can retrieve any deleted files and repair corrupted sectors on the cloned partition. |
Note: Depending on your requirements, you may want to analyze what sort of partition suits you the best. If you want to create a backup, then a file-by-file copy allows you to clone a partition with all the essential data intact quickly. However, a sector-by-sector copy is ideal if you desire improved file recovery or to restore any corrupted files.
Part 4. Preparations Before Cloning Partition on Windows 10/11
Before you copy a partition to another drive, a few prerequisites require your attention. Without the checklist, there is a chance that the partition cloning process won't execute correctly. In the worst-case scenario, you might corrupt both the drives in the process and have to start with none of your data saved on your system.
Ensure that the drive has free space
You can only clone partitions to a drive that has enough unallocated space. Your destination drive should have a size that matches or is more than the original drive. In case the drive is already configured with another Windows file system, or you don’t have enough unallocated space, you can use Windows Disk Management to make it so.
Double-check the drive connected to the system
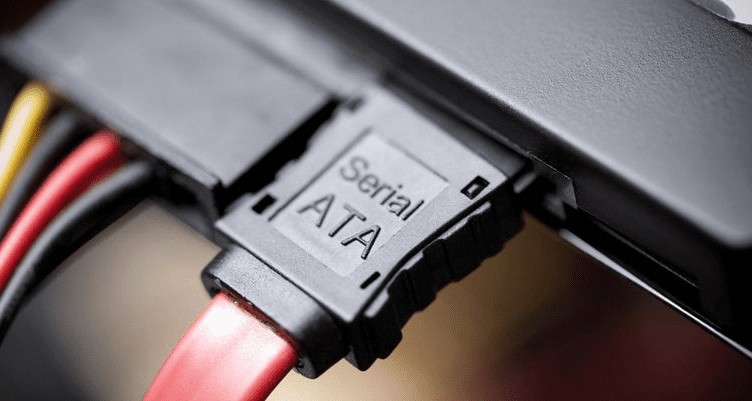
One crucial aspect of partition cloning that most users overlook is checking the SATA connection to the system. A loose cable can terminate the process midway, and you'll have no choice but to start all over again. So, before you clone any partitions, it helps to check that the cable connections to the system are firm. In the case of SSD, ensure they're in readable slots and don't overheat.
Verify the integrity of the drive
Once you've secured the connection, you must ensure the drive is readable and ready to start the cloning process. You can look it over on Windows Disk Management to verify its integrity. Alternatively, there is a 'chkdsk’ command that you can enter within the Command Prompt that lets you know the exact condition of the new disk. It checks the drive for errors and fixes them to make the procedure as smooth and stable as possible.
In case you detect any errors, it is a good idea to debug the drive yourself or through a specialist before using it to clone a partition.
Free up system resources for cloning partitions
Finally, you need to ensure that your system can handle the partition cloning process. AOMEI doesn't take a toll on your PC, but the cloning process can, especially when you have low specs. Close all programs and background tasks before you copy the partition to another drive. Experts also advise checking the system for viruses and ensuring that the drives are not accessed during the process.
If you're still encountering problems, you should run AOMEI Partition Assistant in PreOS mode.
Part 5. How To Clone Partition on Windows 10/11 For Free
Since AOMEI Partition Assistant Standard is available free of cost for personal use, you can use it to clone partitions in the range of terabytes on the drive of your choice. After you've prepared the drive for cloning, you can use the method mentioned below to clone the required partition. You can also check out the video tutorial on Youtube for a more comprehensive guide.
Step 1: Download and install AOMEI Partition Assistant Standard
You can visit the official website to download the Standard edition of the AOMEI Partition Assistant. The installer is free-to-use, and you can run it on any available PC drive. Once you've installed the software, launch it for partition cloning.
For Windows XP/Vista/7/8/10/11
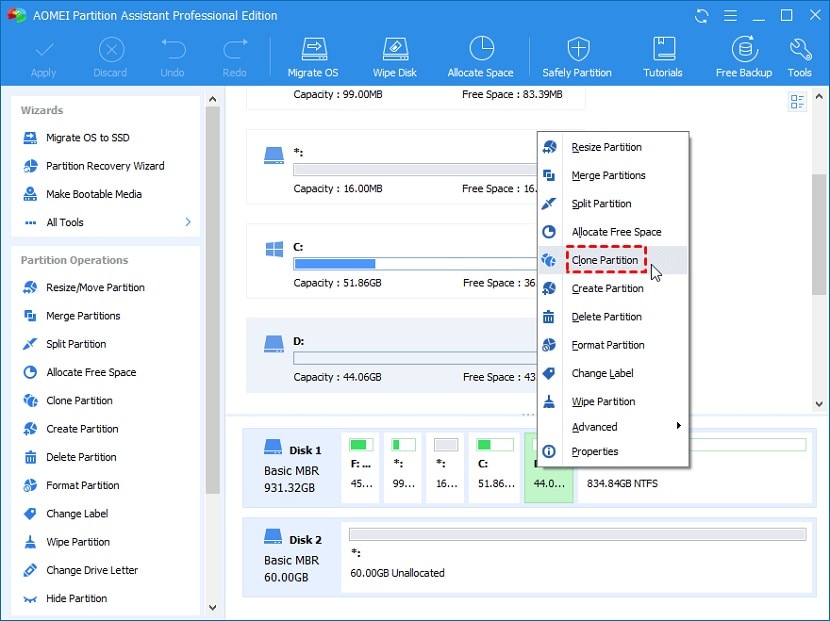
Step 2: Select the source disk and the clone partition type
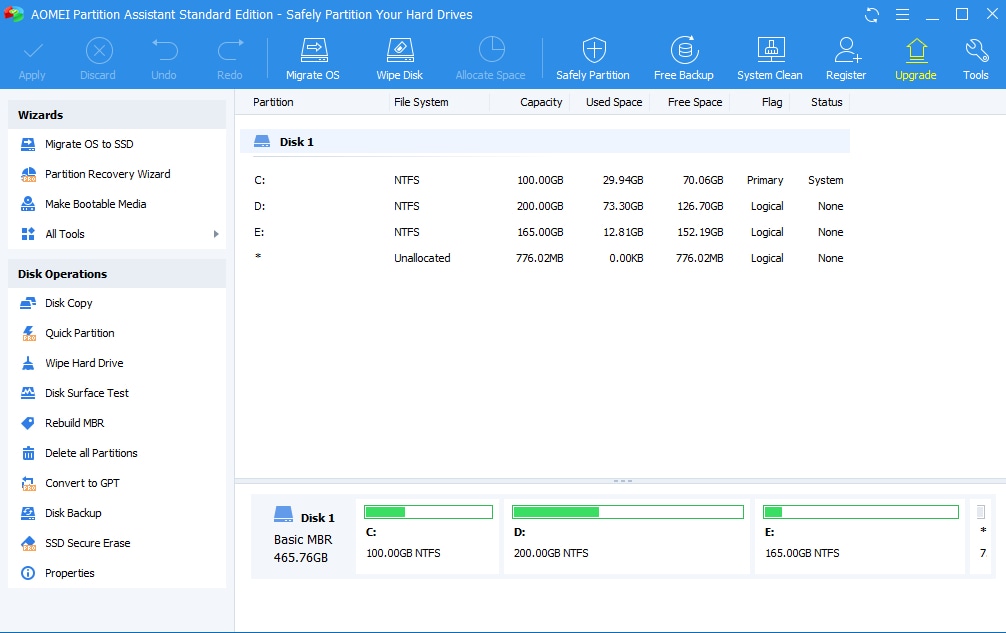
You can observe all the drives and partitions detected on your computer from the launch window. Right-click the one you need to clone and select the Clone Partition option from the drop-down menu.
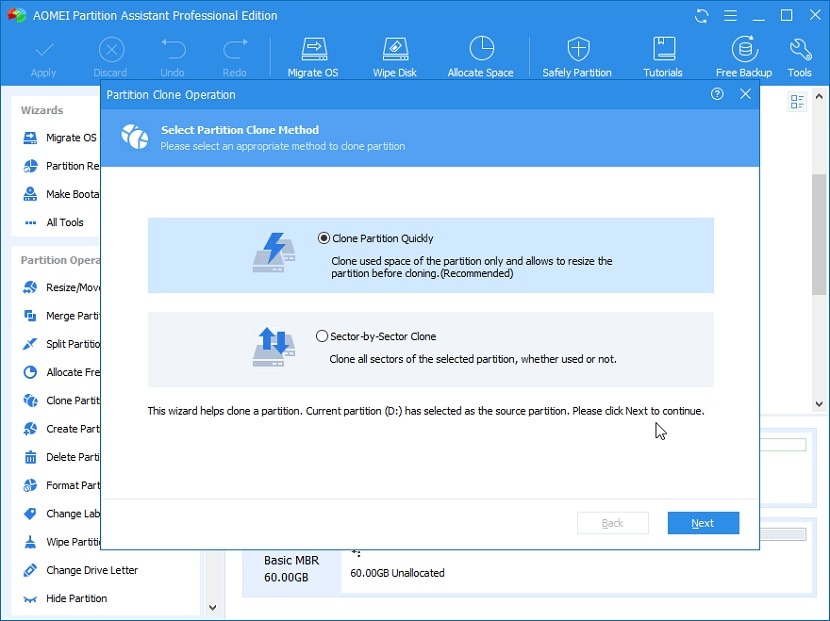
In the following dialog box, you can choose whether you want a file-by-file copy or a sector-by-sector copy, depending on your requirements. Click Next to continue the process.
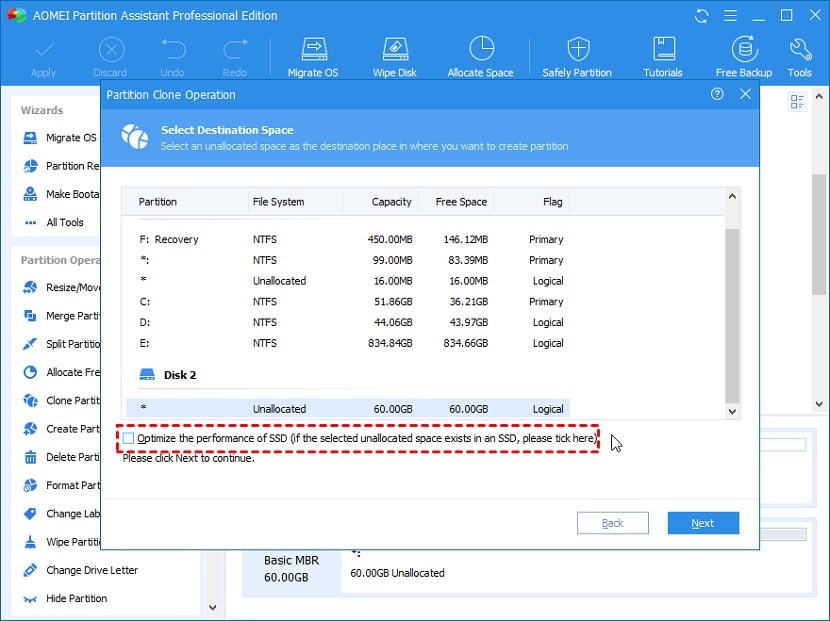
Step 3: Select the target disk with the unallocated space
You can select the destination disk from which you want to clone the partition from the following screen. You can also tick the box that optimizes the performance of SSDs. It allows the OS to read the files more swiftly and speeds up the data transfer.
Step 4: View the target disk layout and set the size of the partition
When you click Next, AOMEI displays the available unallocated space on the target drive. Drag the slider to adjust the size of the new partition. You may want to reduce it if you wish to create more partitions on the target drive in the future.
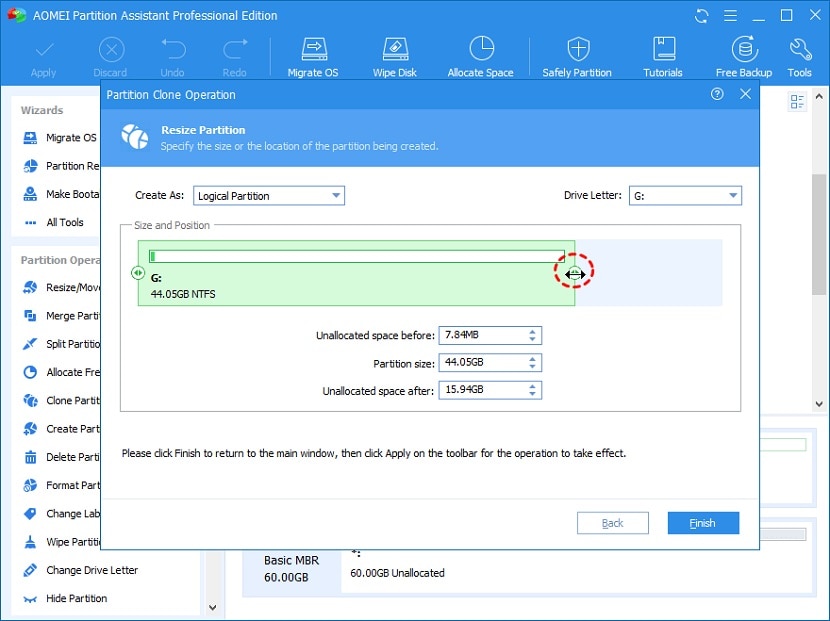
Keep in mind that the file system configuration also occupies some space on the disk. So, leave more storage unallocated than you might need to store the essential data.
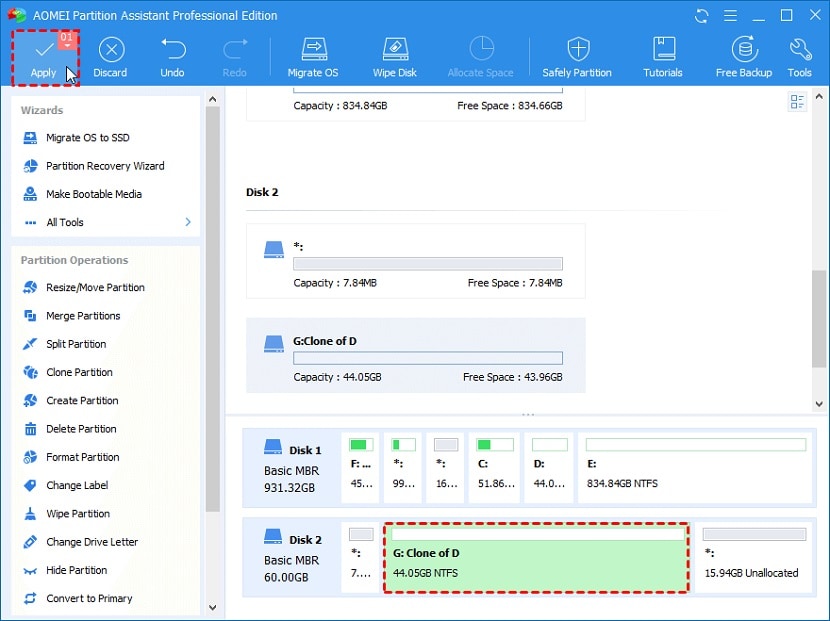
Step 5: Initiate the Partition Cloning Process
Now that you’ve configured the settings, you are ready to commence the partition cloning process. You can do it from the Apply button in the top pane. It will take some time to conclude, so it is best to leave your computer idle and keep it powered as AOMEI does its job.
Once the procedure is done, it helps to verify the integrity of the newly created partition through Disk Management or the ‘chkdsk’ command in Command Prompt.
Conclusion
The AOMEI Partition Assistant Standard is a free tool that lets you create or clone partitions without involving command lines. We hope this guide on clone partition software gave you valuable insights into its functions. If you still have doubts, feel free to leave your queries in the comments.
For Windows XP/Vista/7/8/10/11

