
Jun 29, 2023 • Filed to: USB Recovery • Proven solutions
With the advancement in technology, the way we carry our data and critical files have also been changed drastically. Most of us store our content in USB drivers as they are easy to carry, and we can access it without much trouble. Though getting rid of this data is not as easy as you might think. If you wish to erase the USB drive permanently, then you need to take the assistance of a useful third-party tool. Since if the data is deleted the usual way, later it can quickly be recovered afterward. Therefore, we will teach you how to erase USB Drive permanently with no recovery scope in this tutorial.
Part 1: Overview of Erasing USB Drive
There may come a time when your USB is full of unnecessary data that you may make the USB sluggish, and it would prompt you to erase the contents of the flash drive. There are options to either selectively erase the items or do a complete clean up by formatting the USB drive. Luckily, in this article, we will not only discuss the methods to delete a USB safely but some other that will show you the tips before performing the action.
Part 2: When Do You Need to Wipe a USB Drive?
The file explorer of Windows allows you to delete the files inside the USB individually. It isn’t until something changes within the storage device that forces you to decide on formatting the USB clean by any means necessary. Here are some of the scenarios that will tell you that it is time to wipe the USB drive:
- USB Turned RAW:
The file-format system of the USB becomes RAW due to negligence in handling the device. The PC can not read a USB drive that is in the RAW format, and you will not be able to access your data or save them. The only way out of it and in making the USB usable again is to format or clean the drive thoroughly without delay.
- Virus-Infection:
If you feel that your USB has been infected with a powerful malware or virus and your anti-virus isn’t strong enough to tackle it, then there is no other way than to format the USB drive and save the PC and other files inside from permanently getting corrupted by the virus.
- A Sluggish USB:
Old age plays a significant role in lessening the efficiency and performance of the USB. Sometimes overloading data may also play its part, but it doesn’t help until you completely format or erase the data of the USB drive. Such an action will make the drive as good as new!
Part 3: How to Safely Erase a USB drive
Once you understand the reasons behind the decision to erase the USB drive, the next step is to learn the quickest and efficient methods to do the procedure. In this section of the editorial, we will show you two techniques to safely erase data from the USB drive:
Method 1: Format USB Drive
The simplest way to delete data from the USB drive is to do it through the file explorer. Here are the steps to perform it:
- Connect the USB drive with the computer and wait for the system to detect its presence.
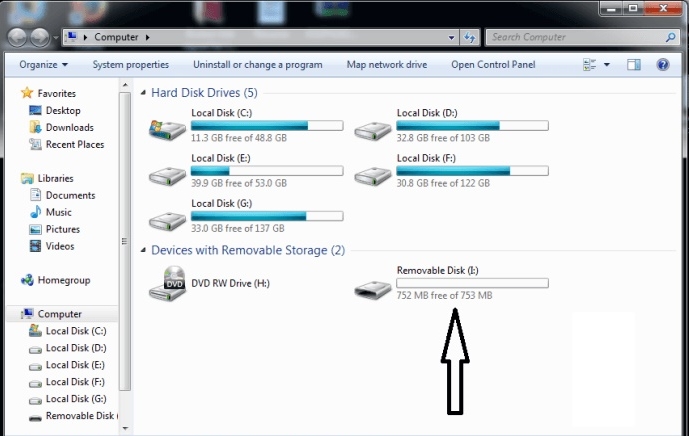
- Go to the Windows File Explorer and locate your USB drive’s icon.
- Right-click on the USB drive’s icon and click on the Format option from the drop-down menu.

- Click on “Start” to initiate the format and click on the “OK” button to proceed past the warning signal.
- Your USB drive will be formatted!
Method 2: Format USB Drive with Stellar BitRaser for File
If you want to get rid of every kind of data from your USB drive, then take the assistance of Stellar BitRaser for File. It is a highly useful and secure tool that can be used to wipe your system’s hard drive, external hard disk, or a USB drive within seconds. It will remove every kind of data from your USB drive with no scope to recover it afterward. All you got to do is use its interactive interface and erase your content permanently.
- It provides a fast and foolproof way to remove every kind of data with no recovery scope.
- The tool has sophisticated algorithms to erase files, internet activities, logs, system traces, applications, and more.
- It can also be used to remove unused space on a hard drive.
- It also generates an erase certificate and provides 100% secure solution to delete files.
- One can also selectively delete files with a single click.
- The tool is fully compatible with all the leading versions of Windows and Windows server.
Now when you know all the benefits of Stellar BitRaser, let’s proceed and learn how to use this remarkable tool to erase USB drive permanently. You can do it by following these simple instructions:
Step 1: Download Stellar BitRaser for the file on your PC and launch it.
Step 2: Connect your USB drive and wait for it to detect it automatically. You can launch Windows Explorer and open the USB drive as well.
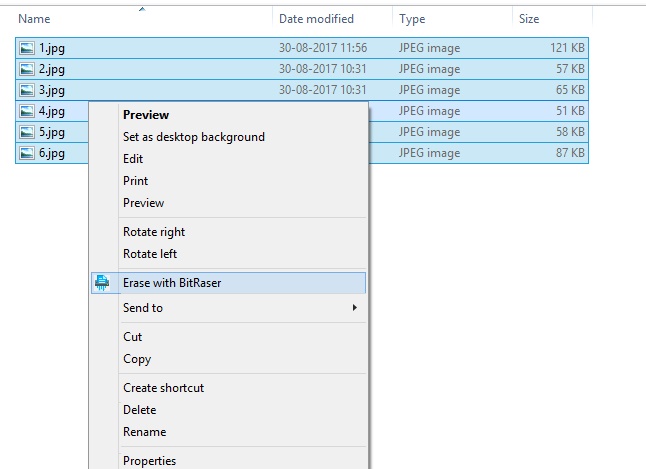
Step 3: If you wish to delete content from the USB drive selectively, then browse to the location and select the files you want to delete. Right-click and choose to erase with BitRaser. It will permanently remove the selected data from your USB drive.
Step 4: If you want to reset your USB drive entirely, then launch the BitRaser desktop application. As you can see, you can access various tools (like file eraser, internet activity eraser, system traces eraser, and more) from the left panel.
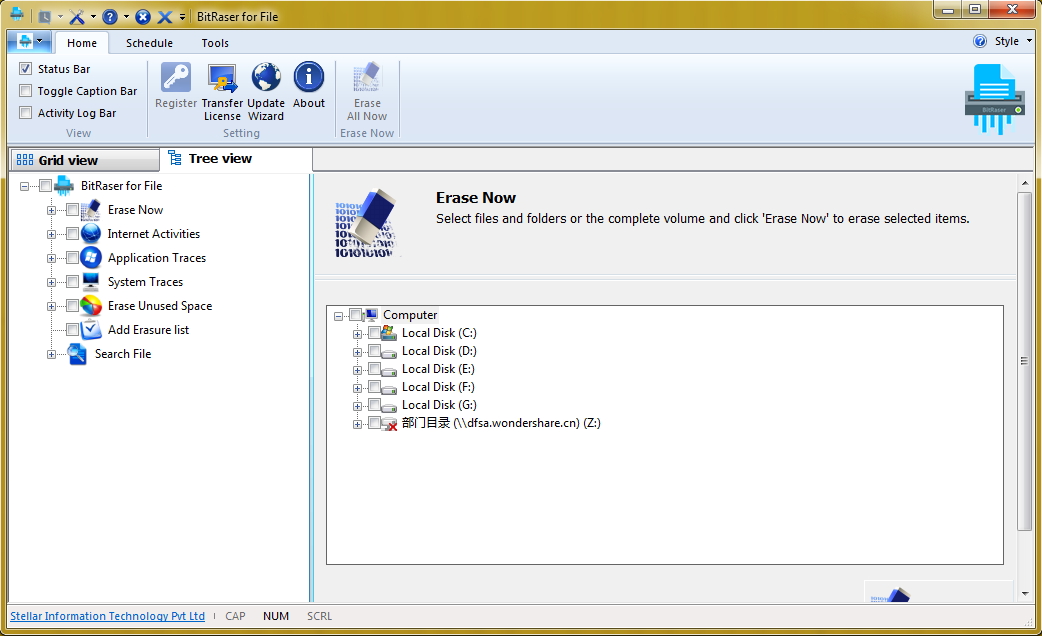
Step 5: Select your USB drive and click on the "Erase Now" button.
There are times when users are extremely cautious as they have sensitive data on their USB drives. Even though your USB drive would be wiped entirely after following the steps as mentioned earlier, you can also perform multiple passes. You can erase your USB drive a few times (two or three) to make sure that its data is deleted permanently without any scope of recovery.
Part 4: What You Need to Do before Erasing USB Drive?
The only viable procedure that you can before erasing the USB drive to create a backup of it. It will allow you to use the files and other contents inside the disk at any time if you think the data is valuable, and you can not afford to lose it. Here are the steps to create a backup of the content of the USB drive:
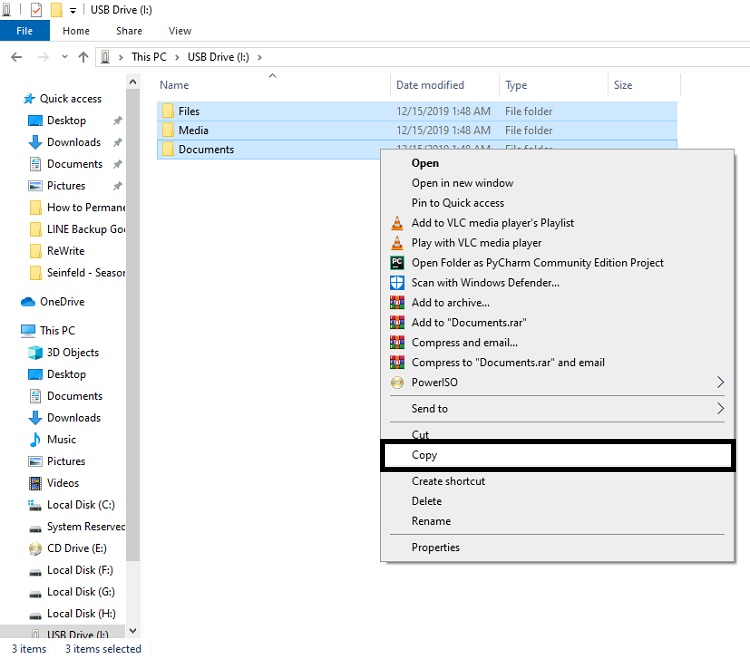
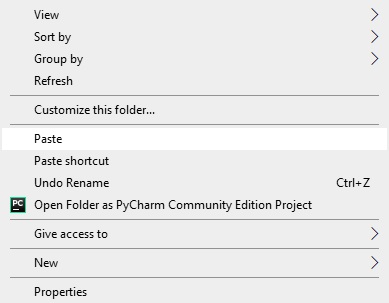
- Please open the file explorer and locate the USB drive after you plug it in the PC.
- Double-click on the USB drive’s icon so that you can see the files stored inside.
- Select the item you want to store someplace else and collectively right-click from there.
- Select “Copy” from the drop-down menu and proceed to the destination where you wish to keep the backup.
- Right-click on the new location and click on “Paste” to save the files.
Part 5: Recover Your Wrongly Erased Data with Recoverit Data Recovery:
If you accidentally deleted the data in the USB drive without creating the mandatory backup for them, then you can quickly recover the file, if you use Recoverit USB Recovery Software immediately. You should also note that if you add any new data or overwrite it under any circumstances, then there is no other way to restore the items. Here are some of the features of Recoverit before you learn the method to use the tool:
- It is available on both macOS and Windows, and it can recover data from any file format system, including HSF+, NTFS, FAT32, and exFAT.
- It supports each external storage device like a USB, SD card, external hard drive, and equipment that allows storing data such as a Drone, camcorder, camera, and mp4 player.
- It has the full capability to recover and read the 1000+ file formats belonging to every file.
- It doesn’t matter what the circumstances are; Recoverit can recover data from a virus-infected source, Recycle Bin, and even a through WinPE.
You can retrieve data from by following the three-step solution of operating Recoverit USB recovery tool below:
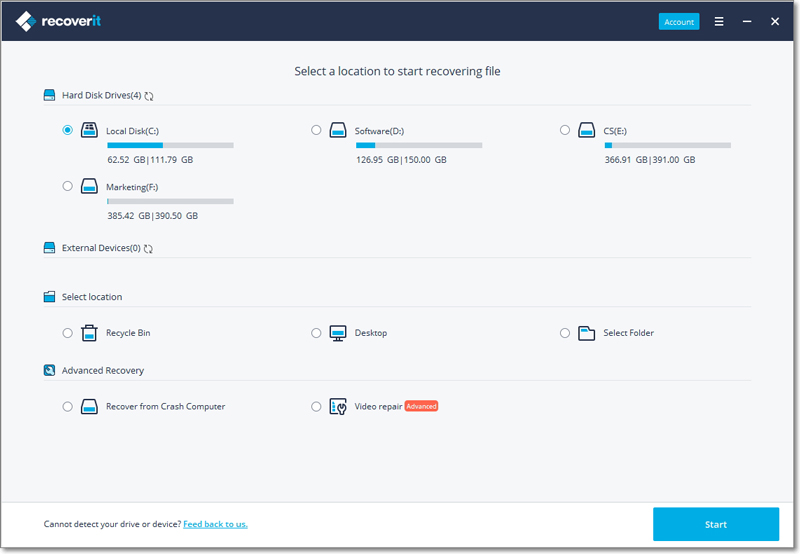
Step 1. Select a Location
Launch Recoverit after installing it on the PC and connect the USB to the system as well through the USB port. Select the USB drive and hit the “Start” tab.
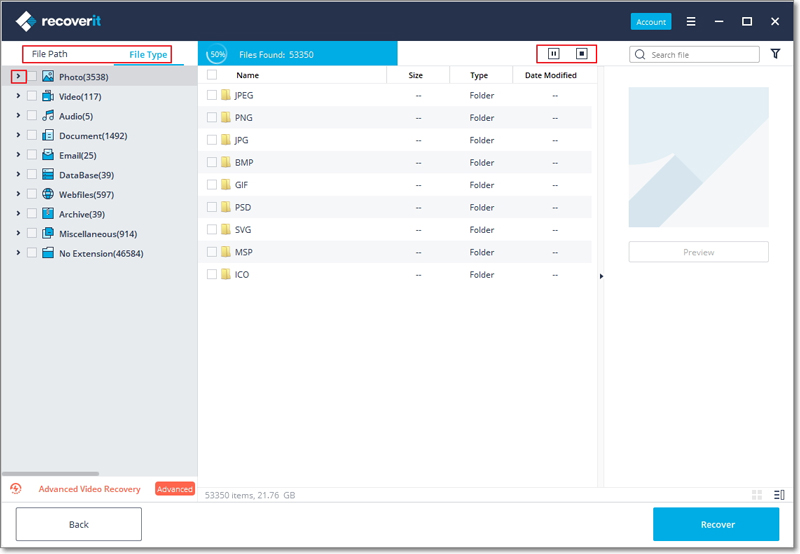
Step 2. Scan the Location
Once the scan starts, you are required to be patient for a few minutes while Recoverit performs its magic. You have the full authority to stop or pause the search/scan for lost data midway. Recoverit will notify you once the search finishes. It will also place the retrieved data under the following categories:
- File Type
- File Path
Step 3. Preview and recover files
Simply select the files and hit the “Recover” button to save the items back to anywhere location you like.

Conclusion:
It becomes unavoidable, and you have to erase the files inside the USB drive when it starts to misbehave or stop working altogether. Now you know the two most accessible techniques to eradicate the data in the USB drive. While it is highly advised to keep a regular backup of the files elsewhere, but if you forget to do that, there is no need to panic as Recoverit Data Recovery tool has the utmost ability to retrieve the erased files without any hassle or disruption.
USB Topic
- Recover USB Drive
- Recover files from USB.
- Recover data from raw drive.
- Recover corrupted USB.
- Recover Sandisk USB data.
- Recover Kingston USB data.
- Adata flash drive recovery.
- Format USB Drive
- Fix/Repair USB Drive
- USB device not recognized.
- Fixed: USB not detected.
- Repair your flash drive.
- Fix USB no media error.
- Know USB Drive


David Darlington
staff Editor