
After your old Mac device is not serviceable or if you buy a new one, it is best to completely wipe the hard drive on Mac. The hard drive contains all documents, emails, contacts, etc., that hackers can still access and steal after you sell or throw the device. Here are the proper steps to clear the hard drive on Mac flawlessly.
Part 1: How To Erase or Wipe Hard Drive on Mac Using Disk Utility?
Different methods are available to safely and accurately wipe Mac hard drive in macOS devices. You can access the Disk Utility app available on Mac and remove the data using different steps. Before doing so, know that the factory reset of the Mac device this way will erase all data permanently. So, it would be best if you backed up everything so as not to lose important documents or information after you reset the hard drive and sell/trade/give the device.
To erase a hard drive, Mac users must follow the following steps accurately on their device. The ones mentioned here apply to Mac devices running with Apple silicon before the macOS Monterey version.
Step 1: Switch on your Mac device. Press and hold the Command (⌘) and R keys on the keyboard until the Apple logo appears. Add the user ID if the prompt to add this comes up, and put in your administrator password.
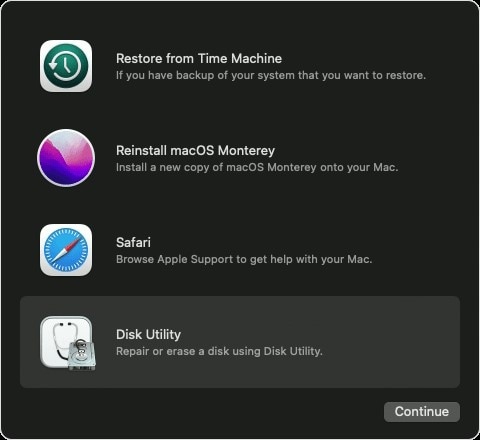
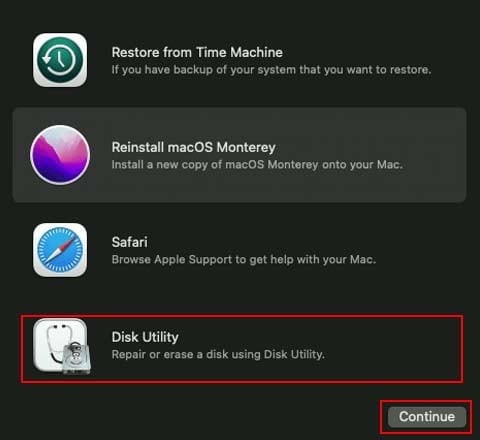
Step 2: Go to Utilities and choose Disk Utility > Continue.
Step 3: On the Disk Utility sidebar, select Macintosh HD.
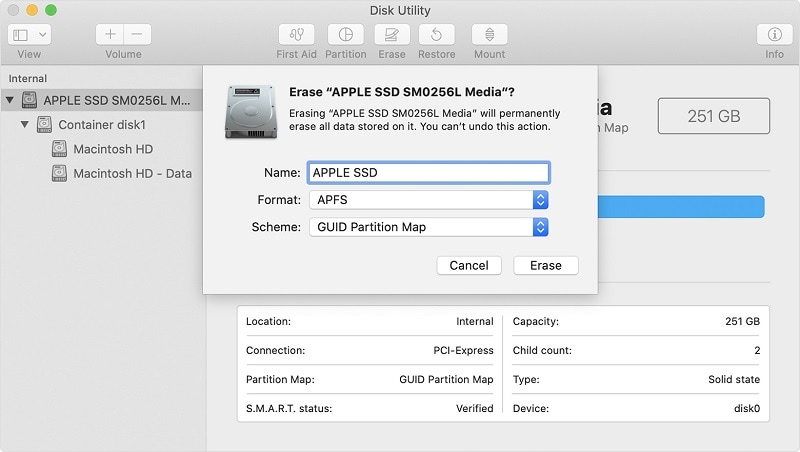
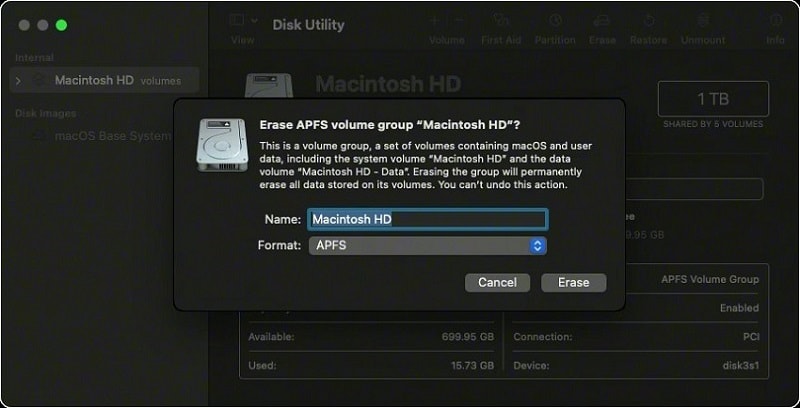
Step 4: Tap on Erase and insert requested details like Name- Macintosh HD, Format- APFS/ Mac OS Extended (Journaled). Tap on Erase or Erase Volume Group based on which is visible.
Step 5: Add the Apple ID if asked. Afterward, quit the Disk Utility function and go back to the utilities window.
Step 6: To start up the Mac device after deleting the volume, tap on the Reinstall macOS option under the utilities window and press Continue. Follow all instructions as they appear on the screen.
Part 2: What To Do if Disk Utility Won’t Erase Your Hard Drive?
In some cases, the Disk Utility does not accurately allow simple hard drive data removal. You will see the option as greyed out or the "Erase process had failed" prompt, and the issue can further harm the drive. You should follow the right solutions to rectify the action and effect.
Ways to Resolve The "Disk Utility Can't Erase Mac Hard Drive" Issue:
Common causes of the error include an outdated macOS device, a mounted drive, choosing the startup disk with the macOS software update, or corrupt sectors to erase. Here are some methods that should fix the problem.
Fix 1: Erase Mac Hard Drive by Enabling ‘Show All Devices’
Under the Disk Utility app, Mac users can see the available volumes or partitions in the system, not the whole hard drive. Partitions are separate sections within one parent hard drive that is useful for handling hard drive data in an organized way. The following steps are helpful for viewing and wiping the Mac hard drive:
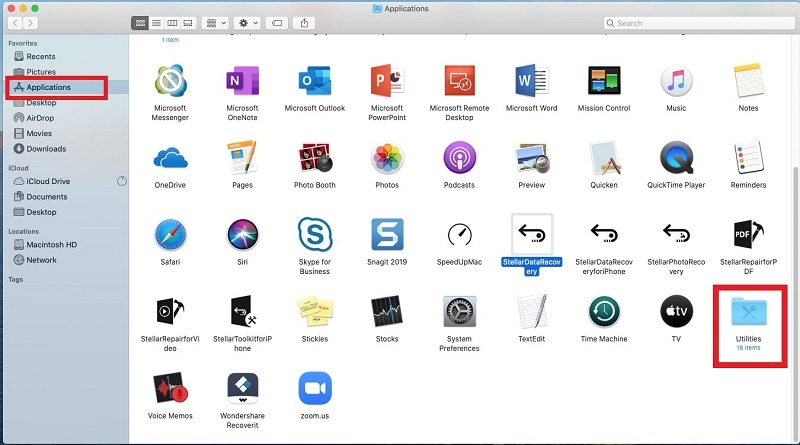
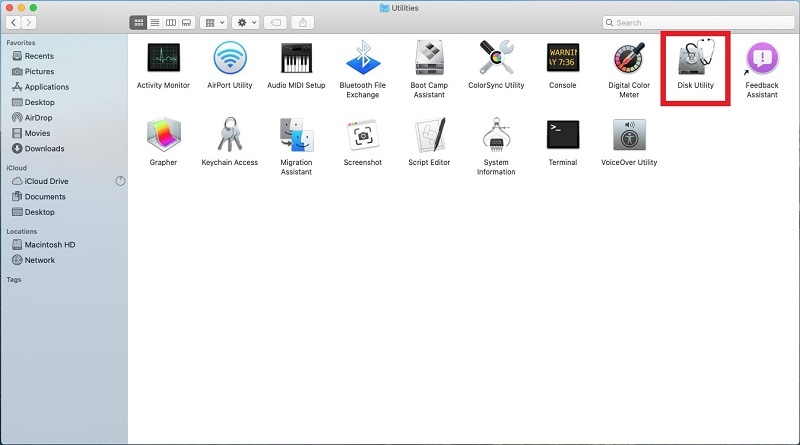
Step 1: Go to the Finder app and access the Applications tab in the sidebar. Tap on the Utilities option.
Step 2: Under the Utilities folder, select Disk Utility to open it.
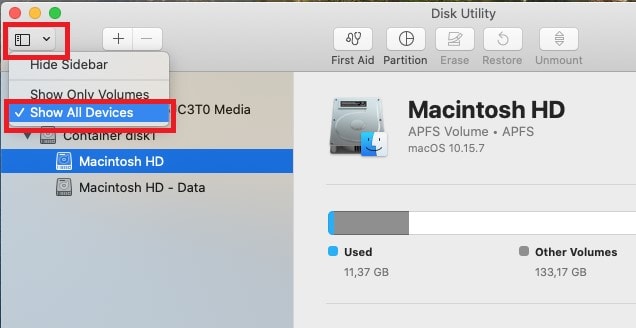
Step 3: Click on the View button > Show All Devices.
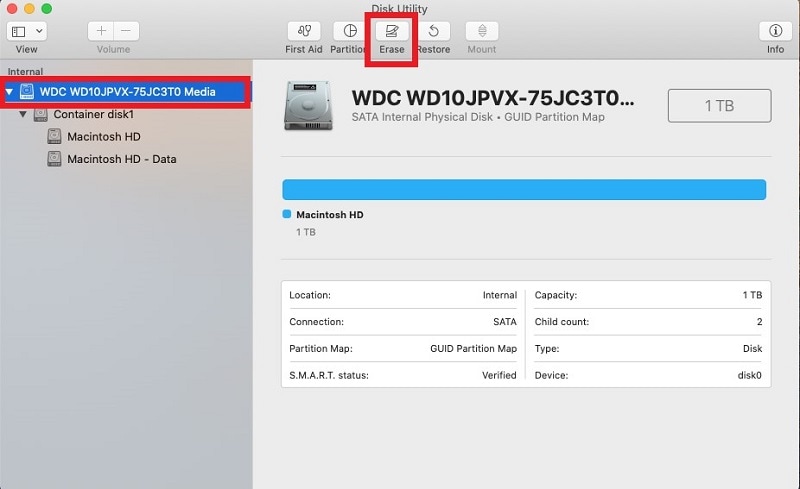
Step 4: Choose the parent folder for the drive you will clean from the list on the sidebar. Tap the Erase button.
Fix 2: Use First Aid to Repair Drive before Erasing
To erase a hard drive, Mac users can try the First Aid feature to repair whatever is causing the erasing error to happen. Run this feature with the following steps:
Step 1: Go to the Finder app on your Mac and access the Applications tab. Then, click on Utilities > Disk Utility.
Step 2: Select the hard drive you will wipe clean.
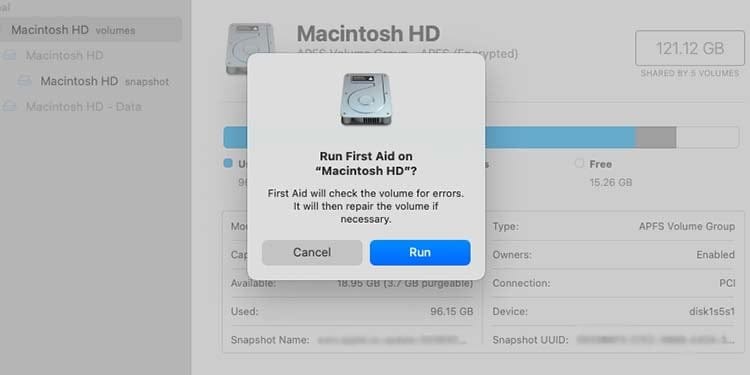
Step 3: Tap on First-Aid from the top bar and hit the Run button. This will start the process.
Step 4: Tap on the Done button when this completes.
Fix 3: Use Recovery Mode to Erase Mac Hard Drive
In case the methods with the desktop environment are not working to wipe Mac hard drive, you should use the Recovery Mode. Boot the device in this mode and erase all data through that. The steps include:
Step 1: Restart your Mac device.
Step 2: Press the Command + R keys and hold them until the Recovery Mode launches. Let go of the keys when the Apple logo comes up.
Step 3: Click on Disk Utility > Continue > Erase.
Part 3: Accidentally Erased Hard Drive in Disk Utility? It's Recoverable
The previously mentioned situations are examples of intentionally deleting the hard drive when unknowingly deleting all data before selling or discarding the device. In these cases, the erase Disk Utility Mac steps are suitable. But what if the hard drive wiping process was accidental?
In such cases, users should save data backup beforehand to avoid losing everything permanently. Examples include accidentally pressing deleting on specific folders, sudden crashes, or accidental damage.
If you are facing a similar issue, worry not. Wondershare RecoverIt is an effective tool to restore all lost data efficiently, including permanently deleted ones from damaged devices.

Wondershare RecoverIt - One-Stop Solution For Recovering All Data From Wiped Hard Drive on Mac and Windows
5,481,435 people have downloaded it.
Restore more than 1000 file types and data formats from devices.
Deeply scans the hard drive and other 5000+ storage devices, like SSDs, HDDs, external hard drives, and more.
Helpful in restoring lost and deleted files from different situations like virus attacks, formatting, accidental deletion, system crashes, etc.
Choose which drives, folders, or file types to search and recover from.
Preview the files before the recovery process for accurate selection.
Both RecoverIt free version and a paid advanced version are available for users to try out.
How to Use RecoverIt To Restore A Hard Drive On Mac?
If you did accidentally wipe Mac hard drive and want to recover it, follow the given steps accurately, starting with launching the software on Mac.
Step 1: Launch the Software on Mac
- Download the Wondershare RecoverIt software from the official website and install it.
- On the Mac desktop, double-click on the RecoverIt icon that appears.
- If it is not visible on the desktop, open Finder > Applications > RecoverIt. Double-click on the software in this folder.
- If you have it under password protection, add the password and tap the Return button or Enter to launch the app.
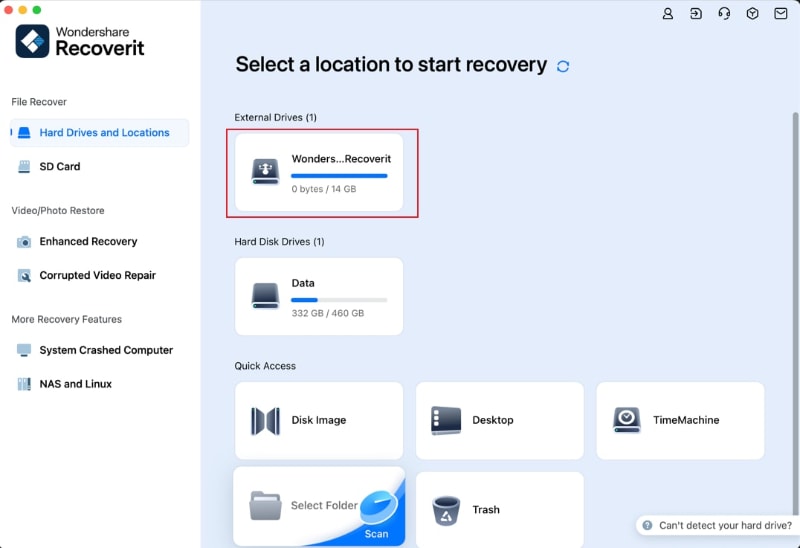
Step 2: Choose the external hard drive
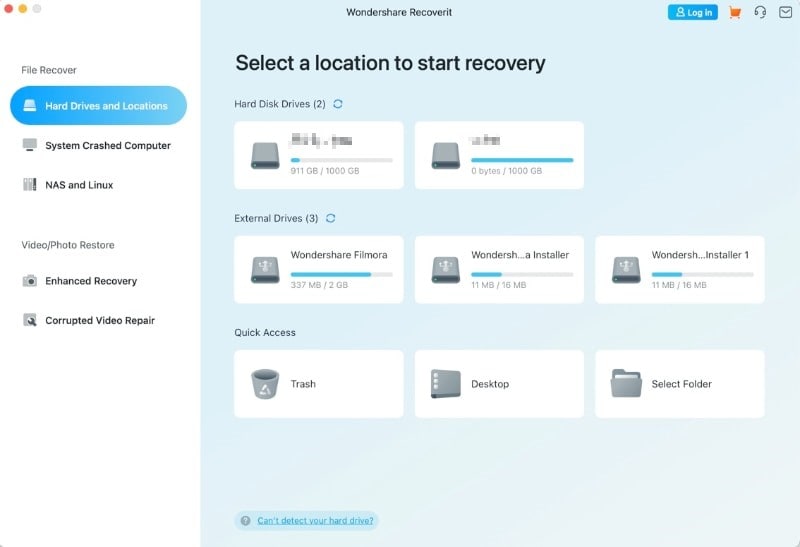
- On the RecoverIt homepage, choose the central location from which the files are deleted.
- Click on the Hard Disk Drive option and press the Start button to begin scanning.
Step 3: Wait for the Scanning Process
- The RecoverIt software will conduct an entire scanning process, so this part can take some time to complete, depending on the content amount.
- During the All-Around Recovery mode, the algorithm will thoroughly scan the hard disk to find lost or deleted files. These include the files users deleted months prior.
Step 4: Restore Files On Mac
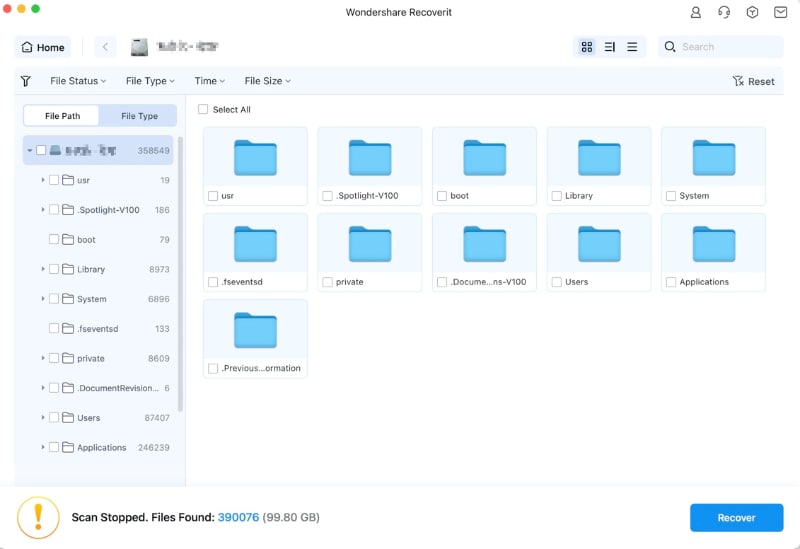
- Click on the file type to select a specific group of files or individual files to select them.
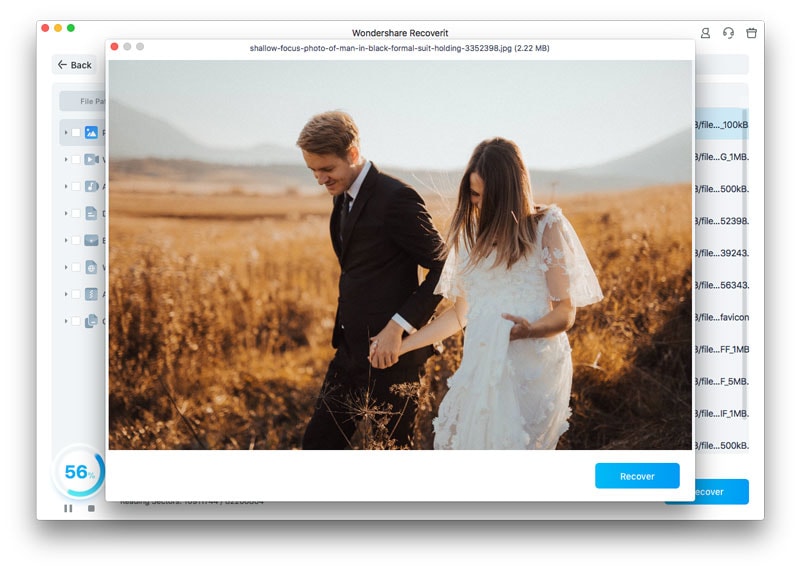
- Double-click on the files you want to check before restoring and see the preview.
- Tap on the Recover button to start the restoration process.
Pros
Preview the files before recovering.
Supports a variety of file types and formats.
Simplified and clean UI.
Deep scanning functionality with zero data loss.
Cons
With the free version, users can recover only 100 MB of data.
Conclusion
Following the methods, you can wipe your Mac hard drives safely and entirely. In case of errors with the process, follow the solutions mentioned in this article. Also, use the best recovery software to restore your files if the hard drive erases unintentionally before completing the backup.
For Windows XP/Vista/7/8/10/11
For macOS X 10.10 - macOS 13
FAQs
How to know if the hard drives on Mac are corrupt?
You can do different methods to check the hard drive's condition on macOS devices. Check if the issue is because of a bad connection or incorrect configurations.
How to fix damaged hard drives on Mac?
You can repair the damaged hard drives in Mac devices using solutions like reformatting and Disk Utility. Consider the cause of the issue before choosing a fix.
Can I recover the deleted hard drives on Mac?
Yes, you can restore the deleted or damaged hard drive data on Mac using a capable third-party software like RecoverIt. If the files are not permanently deleted, they might also be available in the Trash.
What causes the failure of the hard drive erase process?
If users try to erase a startup disk, mounted device, or outdated macOS software, they can see the failure of the erasing process of the hard drive.
How to see how much storage is available in specific hard drives on Mac?
To see the storage availability in specific hard drives on Mac, go to the Finder app > Preferences > the drive name. After clicking on it, go to File > Get Info.

