
To create a faster and more efficient system, you are likely to set up network-attached storage (NAS), more commonly known as RAID 0.
Raid 0 stripes (splits) the data across two or more disks and manages a much more desirable read and write performance. However, with no information parity, redundancy, fault tolerance, and zero data protection, data recovery for RAID 0 is a headache.
Therefore, the most reliable solution to gain access to deleted data is professional RAID 0 data recovery software. In this summary, you learn how to retrieve data from a RAID 0 hard drive.
In this article
Part 1. An Overview of RAID 0 Data Recovery
RAID 0 (aka disk striping) is a feature to improve reading and writing performance and create a much faster system by combining at least two physical disk drives into one in a striping aggregation. Learn more about what RAID 0 is.
Here is a list of RAID 0 pros and cons:
RAID 0 Pros
It combines multiple disks into a single giant storage space.
Splits data across the disks allows for higher data throughput.
It has high performance and high speed ((write and read).
RAID 0 Cons
It has a higher system failure probability compared to single drives. This is because if one drive fails, so does the rest of the configuration, and all data is lost.
Zero-fault tolerance means no data protection, and all data are lost in case of system failure. Because it does not duplicate data or store information.
Lack of redundancy
That said, any drive that fails in RAID 0 can cause complete information to be lost throughout your system. RAID 0 technology lacks parity, redundancy, or fault tolerance. So, any hardware and software issue, and data loss in one drive, can eventually lead to the remaining data on the other drive(s) being pretty much unusable (either lost or inaccessible).
The Most Common RAID 0 Data Loss Situations
With RAID arrays, higher speed and better performance are expected, yet data recovery is tricky or sometimes impossible. More so, with RAID 0 level, retrieving deleted data is much more complex. Knowing what situations can cause the problem helps you prevent the issue more often.
These are frequent causes of RAID 0 data loss:
- Controller Malfunctions: One of the most common issues related to RAID 0, which can cause booting problems and result in data loss.
- Data Deletion: Whether intentionally or accidentally, deleting data can happen. Not to mention, reformating can delete data, and it is recommended to have a backup beforehand.
- Malware: A virus or any malware can render your RAID 0 system inaccessible; therefore, it is imperative to protect your data and hardware using antivirus and firewalls. Don't forget to back up your files and similar preventive measures once in a while.
- Missing Partition: With RAID, partitioning for a more speedy operation is customary; however, when RAID partitions are corrupted, it can lead to data loss. Nevertheless, if the system cannot find a partition although it exists, RAID failure or data loss results.
- Power Surge: A massive spike in the electrical system's current damages your PC and harms the hard drive in a RAID array, leading to data loss. It can also be the reason for controller malfunction.
- Software Upgrade: Be cautious regarding upgrading applications that can cause data loss or even revokes access to the RAID 0 disk.
- Drive Replacement: Choosing the wrong replacement for RAID 0 or using an improperly formatted drive can be risky. Even with a compatible replacement, drive failure and data loss is possible.
- System Setting or Registry Error: Software-related issues can occur if you mistakenly choose the wrong setup. Make sure to double-check settings before confirming.
- Multiple Disk Failure: It can cause ultimate loss for RAID data, and software configuration, hardware incompatibility, and power surge can all lead to failing drives.
- Out-Dated Server: It could cause server crashes, one of the main reasons for RAID 0 data loss.
Read More: An Easy Guide to Know What RAID Is
Part 2. How to Recover Data from RAID 0 Drives
3 Methods to Recover Data from RAID 0 Drives
Method 1: Using RAID 0 Data Recovery Software – For All Data Loss Situations
The first recommended method is using RAID data recovery software, and Wondershare Recoverit data recovery is a professional and reliable choice. This user-friendly application is very straightforward, and newbie users can work with it to bring back lost files without any prior technical knowledge.
Wondershare Recoverit – The Best RAID 0 Data Recovery Software
5,481,435 people have downloaded it.
Recover data from multiple RAID levels, including RAID 0, RAID 1, RAID 5, RAID 6, RAID 10, etc.
Recover files lost due to disk failure, accidental deletion, system corruption, or any other causes.
Recover lost or formatted RAID logical volumes.
Supports storage media & RAID arrays having FAT, exFAT, & NTFS file system. .
To know how to recover data from RAID 0, proceed as below:
Step1Select the RAID 0 Drive
Launch the Recoverit and pick a location to scan. When you witness an unexpected RAID 0 data loss, you must select the RAID 0 drive from where you lost your files. Then click on the “Start” to proceed with scanning.
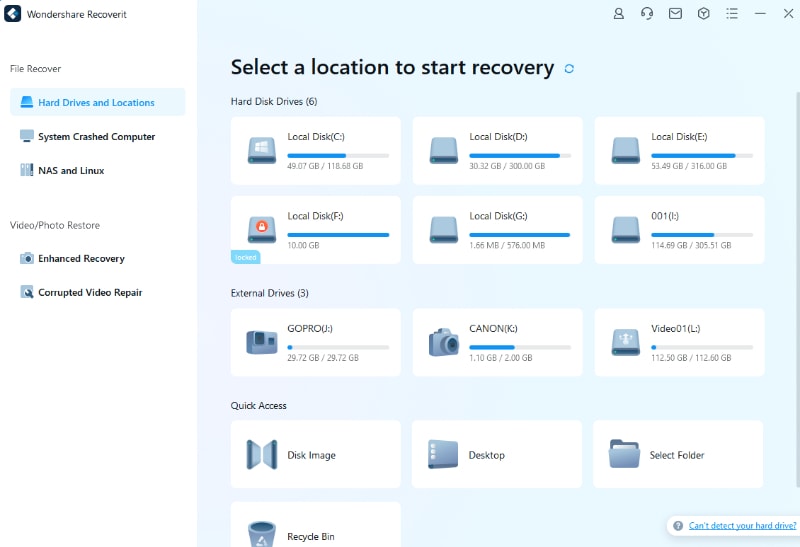
Step2Scan the Selected Drives
Wait for a few minutes for RAID data recovery to find lost content from the selected drives. You may pause the procedure if you have already seen the files you've been looking for.

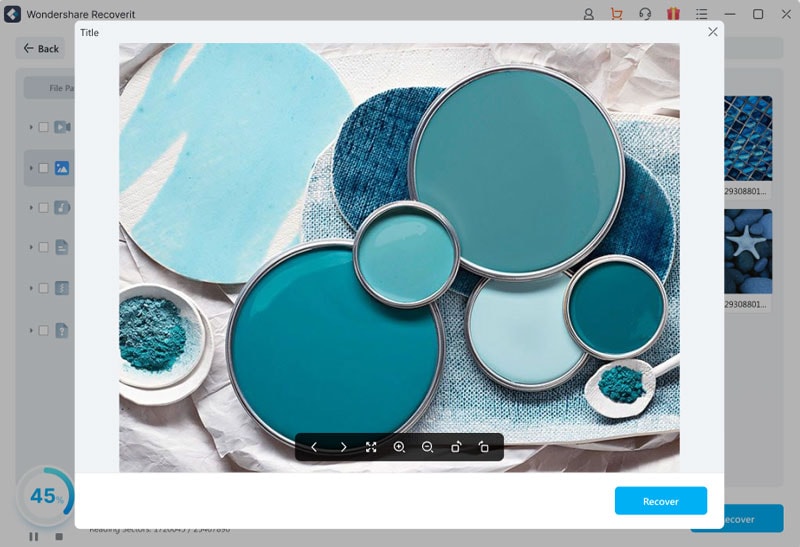
Step3Preview and Recover
One of the good features of Recoverit is showing a preview of your deleted files before recovery goes through. You can watch a preview of your photos, videos, and texts, select the ones you need to be saved, and then click on "Recover" at the end. Be careful not to keep them back in the corrupted RAID storage this time.
For Windows XP/Vista/7/8/10/11
For macOS X 10.10 - macOS 13
Method 2: Connecting the RAID 0 Disks to a New Computer and Recover Data - For Disk Failure
Another introduced method to recover RIAD 0 data from damaged disks is disconnecting the problematic RAID 0 drives from your PC and connecting them to another computer.
The instruction for this method is as follows:
- Step 1: First, disconnect the RAID 0 drives from your current PC.
- Step 2: Now mount the RAID 0 drives to a non-problematic computer.
- Step 3: Once again, check if you can access the data on your drives; if the information is attainable, you can successfully copy and save the files in secure media.
Pros
In case you own another PC, this method is simple and free.
Cons
Low success rate: Not always practical, and you probably retrieve only partial data or sometimes none.
Method 3: RAID 0 Reconstruction - For Disk Failure
For RAID 0 reconstruction, there is free software you can use; and here is the step-by-step instruction for RAID 0 data recovery with Stellar Data Recovery Technician on Windows 10 when using the NAS system:
- Step 1: First, turn off the NAS device, disconnect the disks, then connect the RAID 0 disks to another computer running Windows 10 and confirm the detection of the operating system.
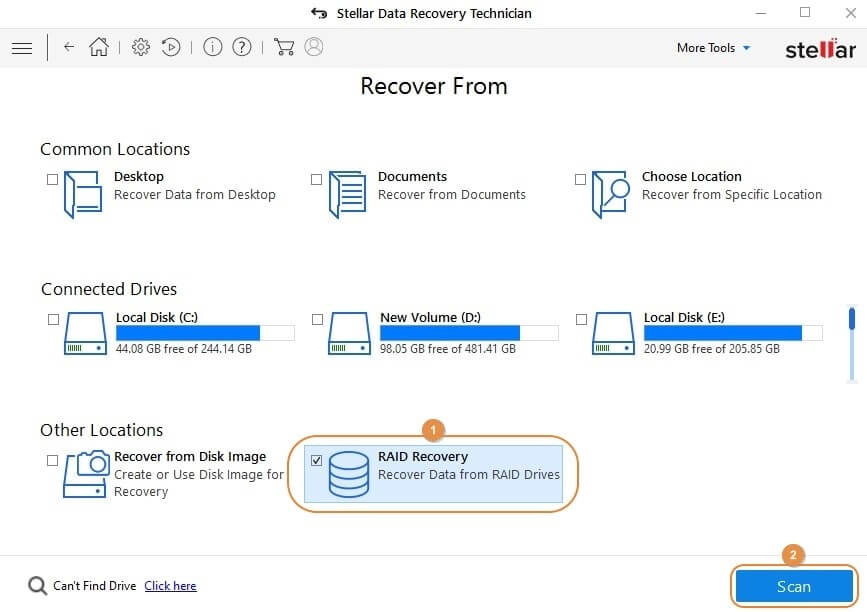
- Step 2: Download and install Stellar Data Recovery Technician, then launch it on your PC.
- Step 3: On the main interface, check the“RAID Recovery” box under the “Other Locations” section, and click "Scan."
- Step 4: Then, the "RAID Reconstruction”box appears. Go to theRAID 0tab from the top. Click on the RAID disk under the“Select Hard Drives” to Reconstruct the RAIDwindow, and then click the "Greater-Than" sign to add the hard drive to the right window.
Note: There is a box saying "Don't know start sector of drives…", Check that box and from the "Select one or more probable start sectors list," select the enabled block/stripe size. Then press “Build RAID." Now, wait for the software to start the process.

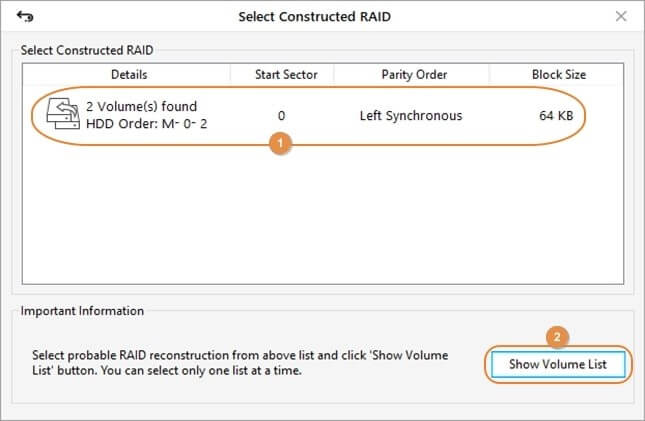
- Step 5: After completion, select the “RAID drive” and click “Show Volume List”from the bottom-right corner.
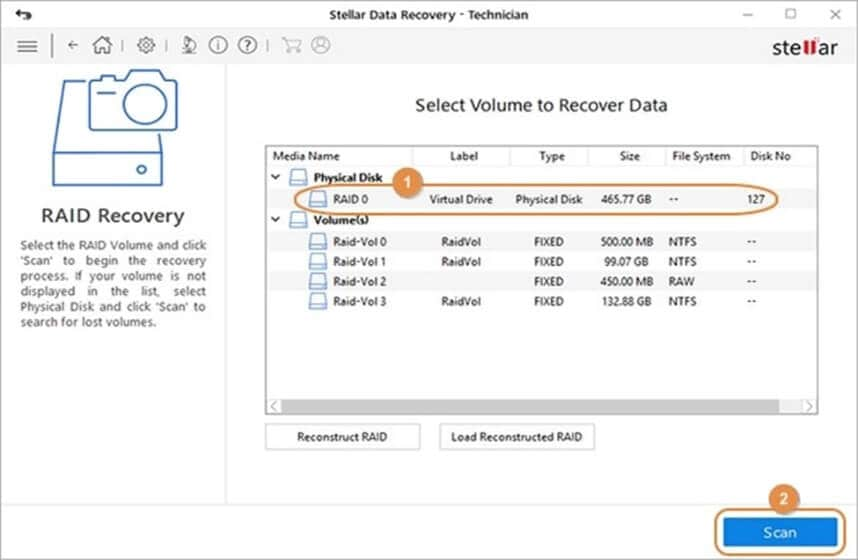
- Step 6: On the next page, click to select RAID 0 from the Physical Disk list and click Scan.
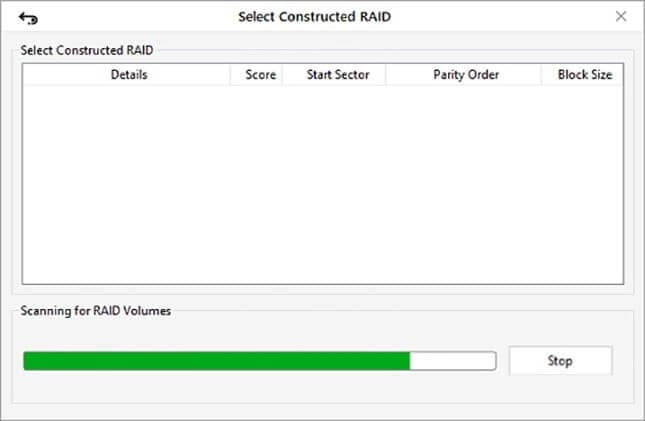
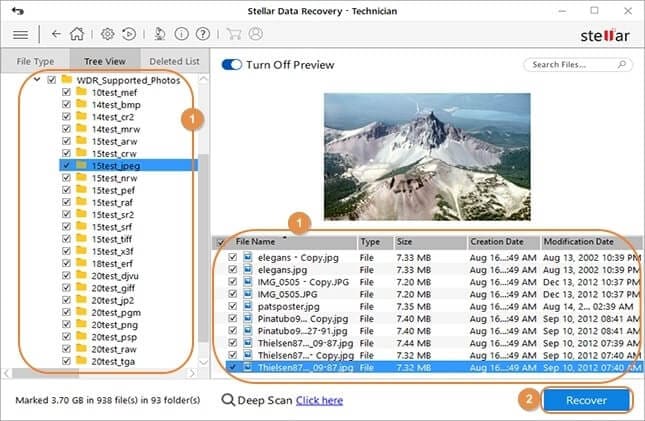
- Step 7: After the scanning process, check the box in the left pane to select all the files that Stellar Data Recovery found and are recoverable.
Also, you can select files individually by checking their corresponding boxes from the list in the lower-right section of the box. Afterward, click “Recover” to continue.
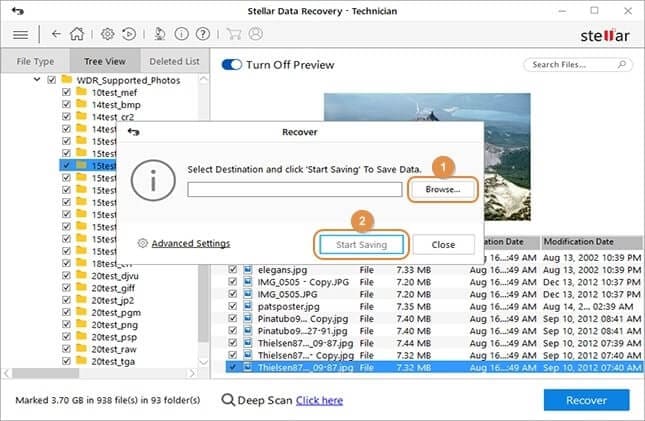
- Step 8: On the next screen, click “Browse," then select a location to save the recovered data to, and click“Start Saving” for the RAID 0 recovery process to start.
Part 3. Tips to Protect RAID 0 Data
To prevent RAID 0 failure or data loss in case RAID 0 fails, follow these tips:
- Don’t use RAID 0 technology if you're dealing with crucial and unreplaceable data; in that regard, other RAID levels like RAID 1 are better options.
- Always have a RAID 0 data backup, so you can always restore files in case of any unexpected data loss scenario.
- When encountering a problem, identify the data loss causes to understand how to proceed with recovery and avoid them in the future.
- When RAID 0 data loss occurs, keep the system offline immediately and don’t attach another device to it to prevent overwriting your lost files.
- You can rebuild and replace the drive in suspicion of corruption or compromise as a precaution.
- Always rely on dedicated RAID 0 data recovery software tools for retrieving your data safely.
Conclusion
With RAID 0, advanced reading and writing performance is tempting but remember; this technology offers no data protection. Therefore, with zero redundancy, and fault tolerance, if you fail to have a backup of your files, it is possible to lose them very easily.
In that scenario, there are not very reliable options in hand, yet using data recovery software is the most effective method.