
Videos are an essential aspect of this modern world. Countless people, whether teachers or content creators, look for a way to record videos on MacBook. If you are a learner who wants to record his online lectures or activities on his MacBook, you would need a recording feature. This will help you in keeping a record of teachings and your work saved on your MacBook, so you can go through the video whenever you want to.
Luckily, there is a built-in feature that helps you video capture Mac easily. The article will teach how to record video on MacBook with complete detail. To get broadly informed on this topic, acknowledge the following topics explained in the article:
Part 1: How to Take Video Capture on Mac?
The simplest way of recording videos on MacBook is with the help of Screenshot Utility. It is a default feature available in macOS. Therefore, it is totally free of cost and does not require any additional software installation. The built-in features of Screenshot Utility include a timer, microphone to record the voice, and visibility of mouse clicks for the tutorials.
This built-in function provides options whether you want to record the entire screen or a selected portion. You can set the timer to video capture Mac screen. After video recording on the Mac software, you can choose the location where you want to save the video.
1.1. Steps Required for Video Capturing on Mac:
Here, we will analyze how to take a video on a Mac with the help of a built-in Screenshot feature:
Step 1: Open the Screenshot Toolbar
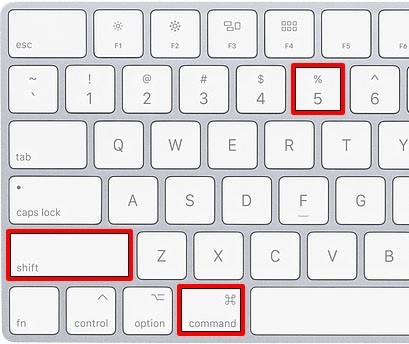
For screen recording, your MacBook, click the Command + Shift + 5 keys on your keyboard altogether. A Screenshot Toolbar will appear in front of you.
Step 2: Select the Screen Portion
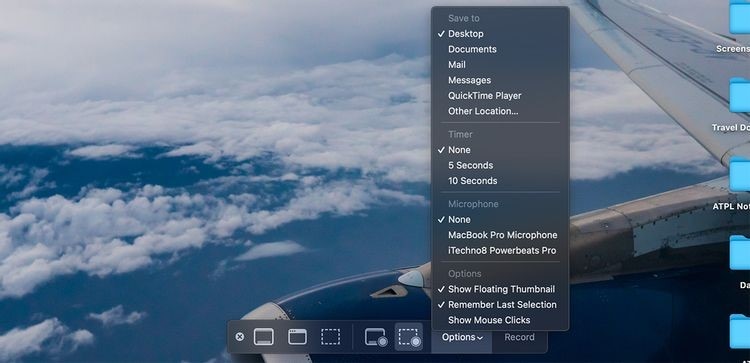
For recording your entire screen, press the fourth button after the "X." For recording a selected portion of the screen, choose the fifth button after the "X." If you have selected to record a specific portion, a box with broken lines will appear on the screen. Click and drag the edges of the box around the area you want to record.

Step 3: Start the Recording
By clicking on the "Options," you can select the desired microphone, duration of the timer, and the location to save the video. Now, click on the "Record" button situated at the right-most side of the toolbar.
Step 4: Stop the Recording
You can stop the video whenever you want to by clicking the square present in the circle icon situated at Mac's top. Recording can also be stopped by pressing the Command + Control + Esc buttons.
Tips: Learn how to Find Files and Folders on a Mac

Part 2: Some Recommended Videos Editing Apps on Mac
We have discussed how to record videos on MacBook. Now, let’s discuss the famous video editing apps available on Mac depicting wonderful editing features.
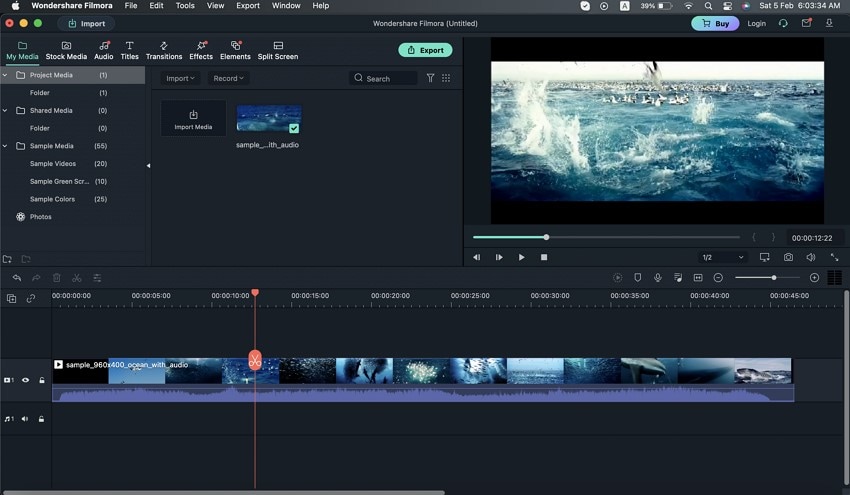
1. Wondershare Filmora
Wondershare Filmora Video Editing application has an easy-to-use interface with new advanced features of animation, transition, and interesting effects for videos. The application supports different input formats of video files, movie files, camcorder files, and flash videos.
The ethereal features of Filmora allow users to trim the videos, perform audio adjustments, add transitions and visual effects to the videos. There are more than 1000 special effects, music, transitions, objects, and audio effects ready for the Filmora user.
Moreover, Filmora has a prominent feature of Motion Tracking, which enables capturing a moving object within a frame. It allows adding captions, effects, and texts when the moving object appears on the screen. You can use the editing software for many purposes. It has the eligibility to be used for ordinary use as well as by professionals to create quality marketing and entertaining content.
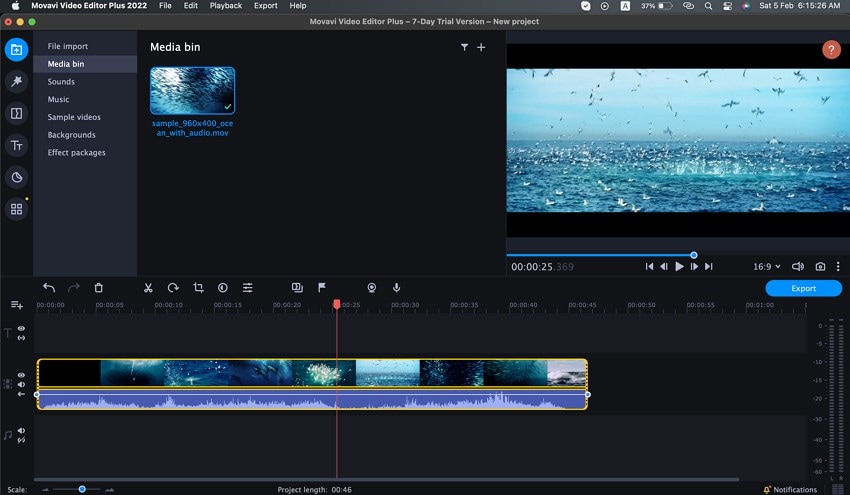
2. Movavi Video Editor Plus 2022
Movavi video editor helps in creating engaging content with the help of interesting effects and filters. This editing application also enables the users to add the animated transitions in the videos to make them look cooler and eye-catching for the viewers. Movavi has a simple user interface that allows an easy import of previously edited videos.
Moreover, it has tons of backgrounds, music, and sounds that you can choose to add to your video. The Transition feature of Movavi helps in joining two videos with Blur in, Zoom in, Warps, Page Turn Effect, and CrossFade features. The software has a built-in training characteristic that helps users quickly acquire the concept of editing videos.
The advanced editing functions of Movavi editor offer titling, keyframing, and addition of subtitles, which make videos super-attractive. It would not be a bad experience for you
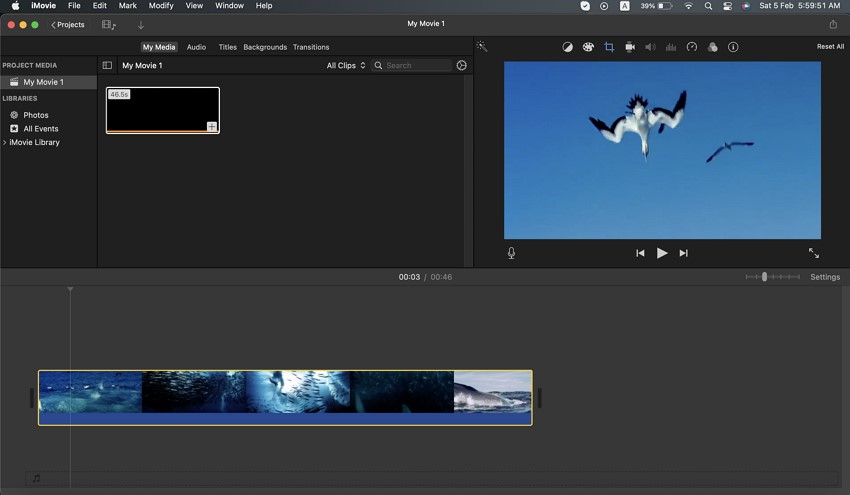
3. iMovie
The best video editing software, iMovie, is totally free for iPhone, iPad, and MacBook users and can be downloaded from the App Store for free. There are customizable features in iMovie that allow changing the temperature, saturation, and contrast of the video to create alluring content. The Match Color feature adjusts the white balance of the footage and makes it look consistent.
There are 29 trailer templates available with different genres, ranging from action and adventure to comedy and romance. It is easy to insert clips as they automatically cling, creating a connection line. It is also possible to trim them or drag the handles to change positions. You can crop- zoom in, zoom out, set the white balance, and enhance the skin tones with iMovie tools.
iMovie video editing software can be used for different purposes. One can create a random video on his life with his friends and family or use this software as a professional tool to create short films and ads.
Extra Tip: Recover Lost Recorded Videos on Mac
Wondershare Recoverit helps in recovering lost, deleted, and hidden videos on Mac. This tool is taking a leadership position as a video recovery tool in the software market. If you have lost your data due to any virus attack, formatting, device corruption, or accidental deletion, the recovery software will save your videos from getting permanently lost.
Recoverit data recovery tool has two efficient ways to save user’s data, i.e., Quick Recovery and Enhanced Recovery. The Quick Recovery feature enables to quickly recapture the videos, while the Enhanced Recovery feature helps in restoring large-sized videos.
This feature deeply scans, gathers, and then ties the fragments together to recover the corrupted file. It helps in recovering most of the user data without any corruption.
Helpful Features Presented by the Recoverit Data Recovery Software:
Now, we will discuss the powerful features offered by Recoverit to recover lost or deleted videos on Mac:
- Professional Recovery Model: Recoverit provides a separate feature to retrieve lost videos of large size with higher success possibilities. This improves and fastens up the data recovery process of videos.
- Camera Brands Identification: When Recoverit retrieves the deleted videos from any camera, it also informs about the brand of the camera.
- Recovery from Multiple Locations: The data recovery tool also assists in recovering files from floppy disks, SSD, external hard disk, USB flash drive, DSLR, and SD cards.
- Data Recovery of Differently Sized Videos: With Recoverit, you can recover videos of different sizes such as HD, UHD, 4K, and 8K without resulting in the corruption of the video.
What are the Steps Involved in Recovering Videos on Mac with Recoverit?
The data recovery feature of Wondershare Recoverit performs a deep scan to recover heavy and complex videos. Here, we will acknowledge the steps you need to perform in order to recover the lost data on Mac. Firstly you need to download the Mac version of Recoverit, and then:
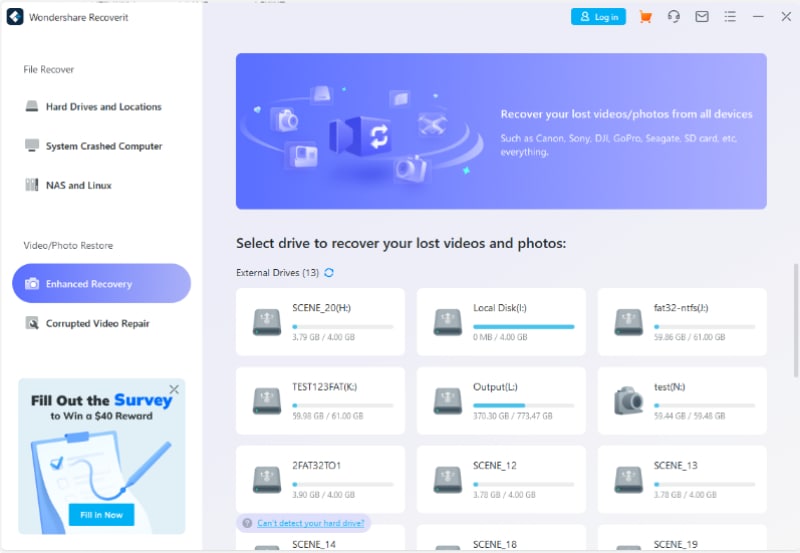
Step 1: Choose the “Enhanced Recovery” Mode
The first step requires you to select the “Enhanced Recovery” mode from the interface and further press the “Start” button. You can select the video files from external devices or disks.
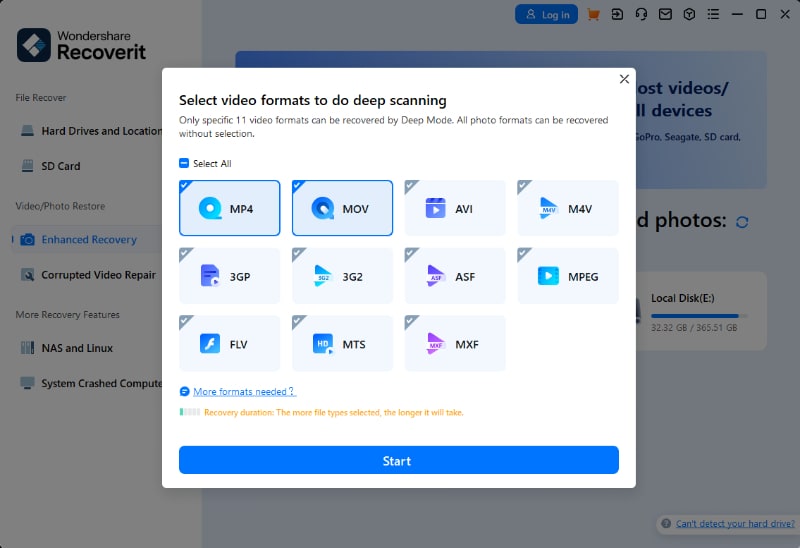
Step 2: Complete the Systematic Scan
Now, select the kind of disk and video format you need to scan in order to complete the process timely. There will be 2 to 3 scans for the video files. The first scan will find the lost video files while the second scan merges the video fragments.
Step 3: Preview and Prosper the Recovery Process
Select the videos you want to preview by clicking on them from Recoverit native interface. Then, you will be able to save the video at the location of your choice by tapping on the "Recover" button if you are satisfied.

Conclusion
Everyone, whether a digital creator, teacher or student, needs a feature that lets him record his online activity. The article has concluded a step-by-step guide on how to take a video on a Mac. We have also given 3 amazing video editing applications that would enable you to create wonderful content.
Moreover, if you want to recover your lost or deleted data, the Recoverit data recovery tool is just the perfect choice to recover your videos without any corruption.

