
Are you an administrator? Looking forward to reducing the chances of your customers being compromised? You must harden your infrastructure. It is only possible once you introduce the best security practices to keep your infrastructure away from attacks. One way to achieve this goal is to remove unnecessary software components from Veeam QNAP.
It does not matter how useful the attached components are; if they are opening the back doors for others to access your infrastructure, you must remove them all immediately. In this article, we will look at how to use QNAP Veeam Backup & Replication effectively to back up your NAS.
Part 1. What Is Veeam Backup & Replication?
When it comes to backup your QNAP NAS, hundreds of solutions are available in the market. However, most people struggle when finding a trusted and efficient way to get the complete job done.
If you are experiencing the same issue, Veeam QNAP should be your number 1 choice. This tool is known for providing a variety of functions, like backup creation, replication, and restoration, for all virtual machines using Microsoft Hyper-V, vSphere, or VMware hypervisors.
Veeam Backup & Replication Architecture
Well, this architecture is built with 3 major parts, as listed below.
- Veeam BR Server: It is basically a central backup server that is designed for managing and controlling the source and destination of the backup.
- VM Backup Source: The source can be a datastore of NAS, virtual machine, personal computer, or server.
- VM Backup Destination: The destination can be network storage attached to Microsoft Networking or iSCSI. It can also be a backup server.
Do you have QNAP Veeam Backup & Replication 9 for Windows? Perfect! You can use it to back up your important data to NAS as well as to recover it from NAS in case of accidental deletion or sudden data loss. The image below shows the architecture of Veeam software.

| Developed By | Veeam Software |
| Initial Release | Feb 26, 2008 |
| Stable Release | 11.0.0.937 (Mar 23, 2021) |
| Operating System | Windows Server 2008 R2 or later Windows 7 or later |
| CPU | Intel Xeon CPU E3-1220 v3 3.1 GHz - 2 processors |
| RAM | 8.00 GB |
| FQDN Name | VeeamA.axellab.local |
| Supported Files | VBM, VIB, VBK |
Part 2. Can Veeam Back Up to a NAS?
Yes, you can back up your sensitive and important information to a NAS by setting up a Veeam QNAP repository. In addition, Veeam Backup & Replication also helps you restore or recover the content of different NAS file shares.
This tool comes with the Veeam Availability Suite bundle, but you can also install it separately on your system as a complete backup solution. Based on the available features, Veeam is available in three different versions.
Part 3. How To Back Up Your QNAP NAS Using Veeam Backup & Replication?
Though hundreds of backup solutions are readily accessible in today’s market, backing up a QNAP NAS is not as easy as it seems. But the good news is that you don’t need to worry if you are looking forward to creating data back up to NAS, as Veeam QNAP makes it easier than you can imagine. Let’s take a look at how you can initiate the backup process and proceed.
Step-By-Step Guide to Using Veeam to Create Backup to NAS
The steps below are associated with backing up a virtual machine to NAS. You can also back up virtual or physical servers with this tool.
Step 1: Download Veeam Availability Suite or Veeam Backup & Replication from the official website and install it following the instructions appearing on your screen.
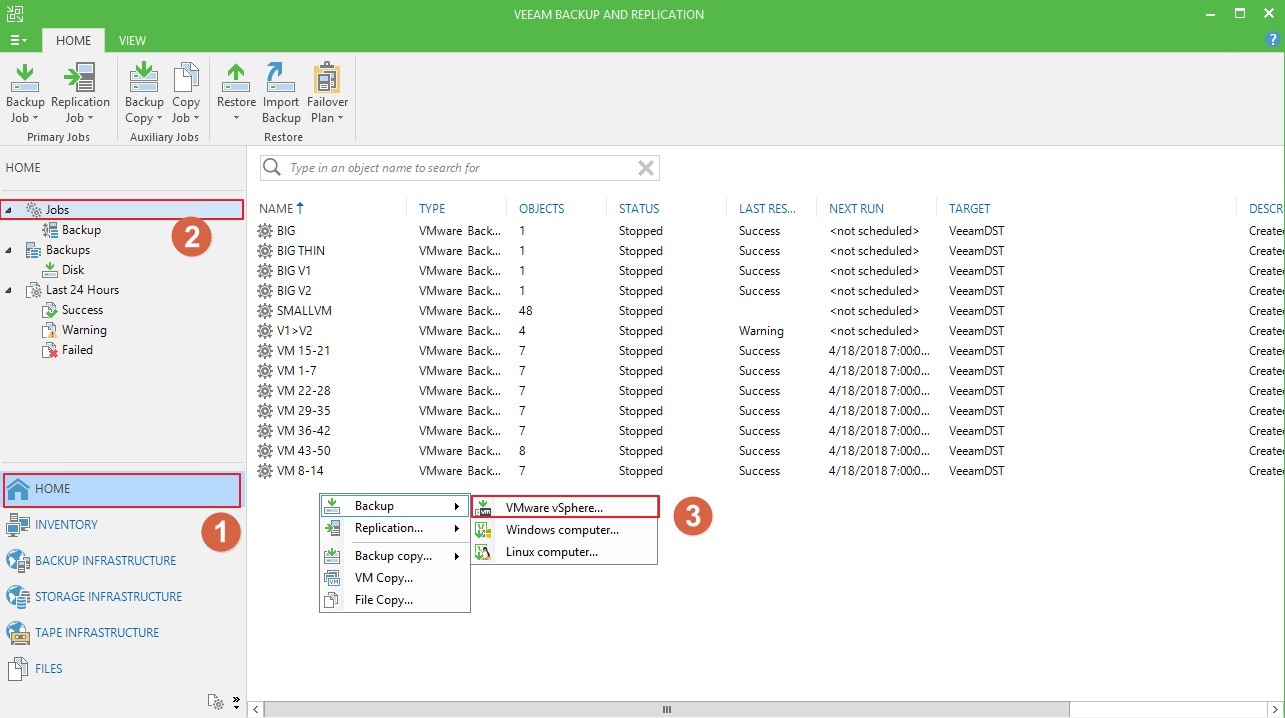
Step 2: Launch Veeam software and tap on “HOME.”
Step 3: Now, click on the “Jobs” option, go to the right window, right-click on it, and choose “VMware vSphere…,” as shown below.
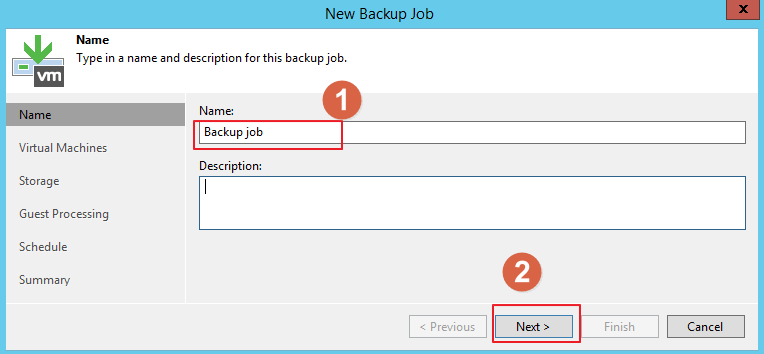
Step 4: It is time to assign the job with a specific name. Once done, hit the “Next” button.
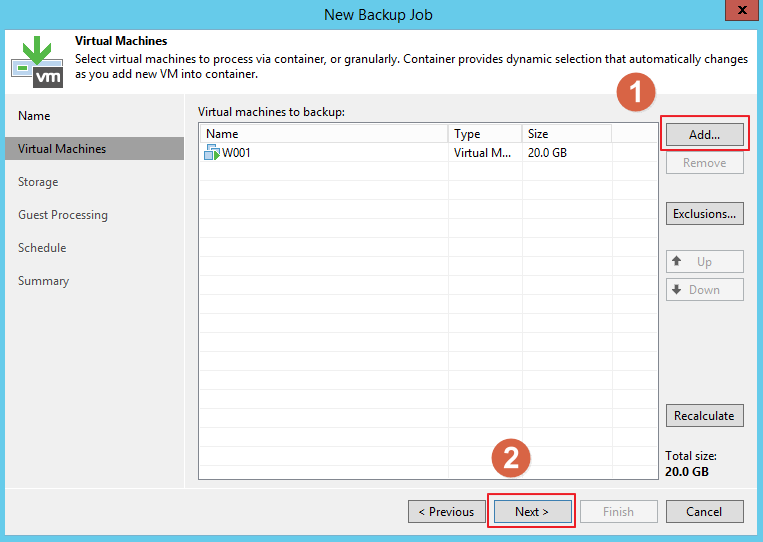
Step 5: It is time to add a VM to back up. For this, click on the “Add…” button and tap on “Next.”
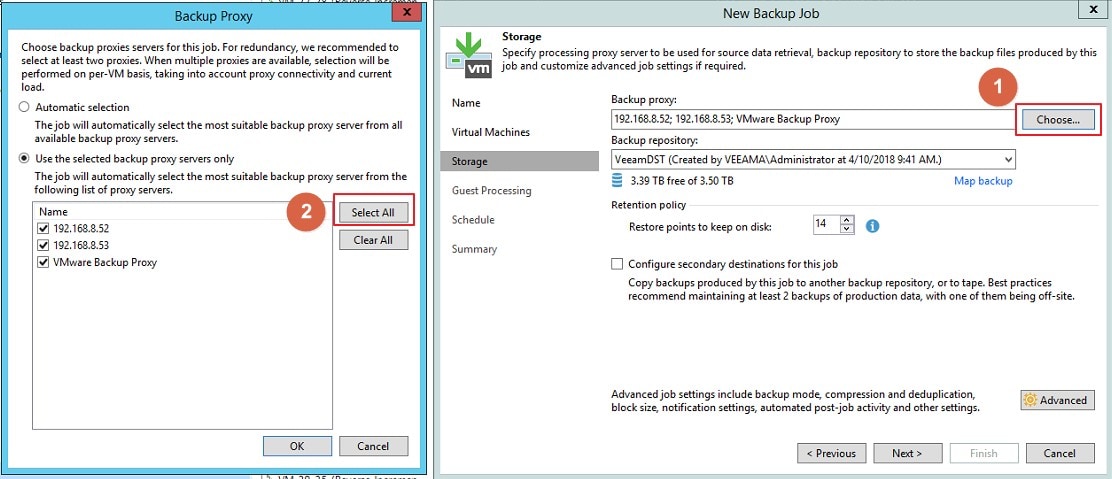
Step 6: This step is about closing the QNAP Veeam repository. Now, the proxy server will assist in triggering the transport mode to SAN and also share backup computing. Choose “VeeamDST” as your backup repository. Then, tap on the “Advanced” option.
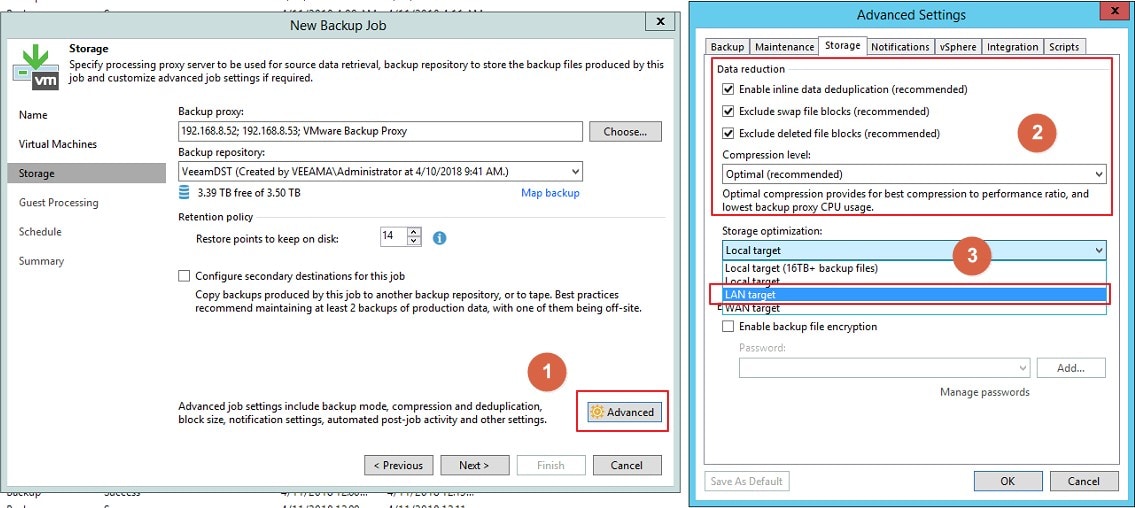
Step 7: Here, you have the option to configure the compression level and data reduction.
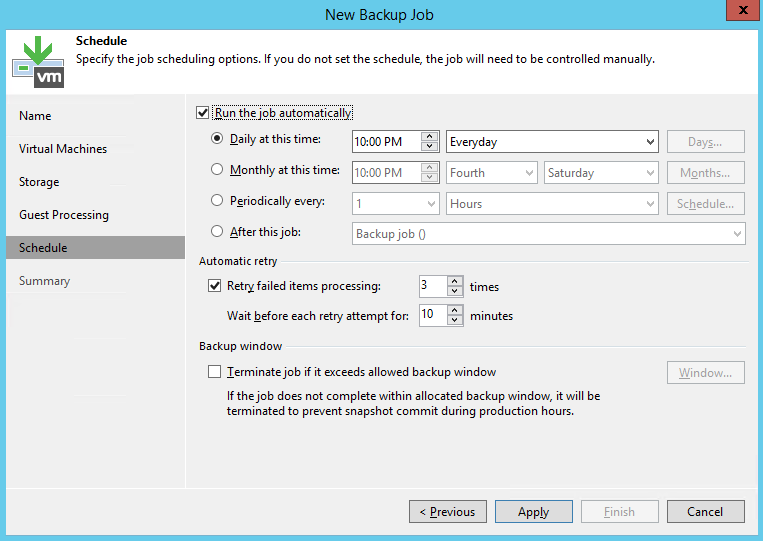
Step 8: As soon as you land on the schedule setting page, you are free to configure the schedule of the backup job.
Note: In case you have multiple backup jobs, it is better to keep in mind the backup time and VM capacity of each job when backing them up.
For instance, if you have 40 backs, you need to back up 800 VMs, as shown in the below table.
Backup Job |
No. of VMs |
Backup Schedule |
| Job 1-5 | 100 | 2 am to 4 am |
| Job 6-10 | 100 | 4 am to 6 am |
| Job 11-15 | 100 | 6 am to 8 am |
| Job 16-20 | 100 | 8 am to 10 am |
| Job 21-25 | 100 | 10 am to 12 pm |
| Job 26-30 | 100 | 12 pm to 2 pm |
| Job 31-35 | 100 | 2 pm to 4 pm |
| Job 36-40 | 100 | 4 pm to 6 pm |
If you count all the VMs listed in the above table, they will become 800.
Step 9: Are you done with configuring the schedule settings? Great! Go to the next page. Then, hit the “Finish” button.

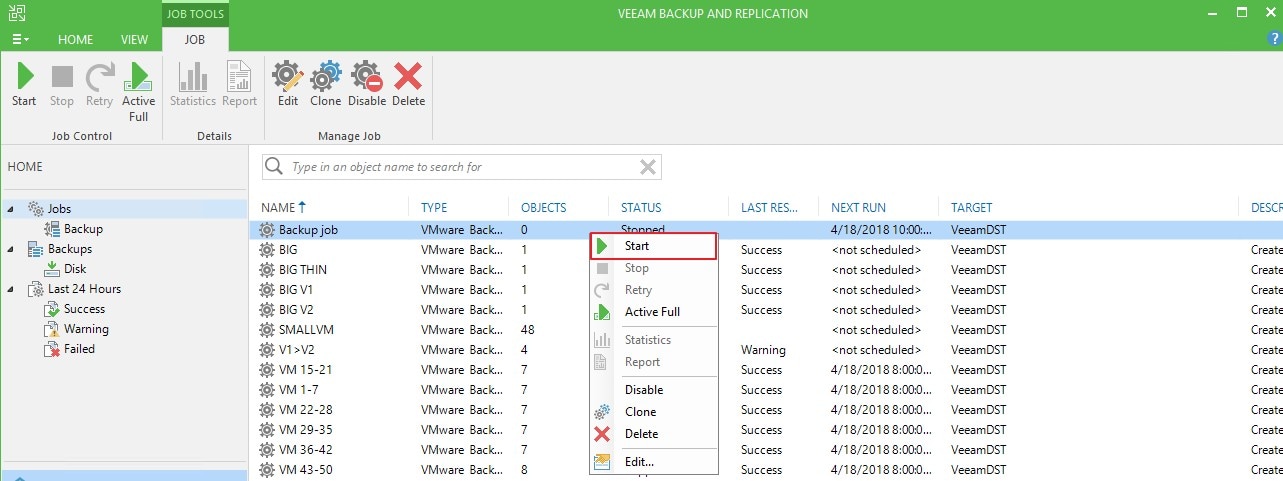
Step 10: Now, select a backup job, right-click on it, and tap on “Start.”
Step 11: If you click on the backup job and then VM, you will be able to see the backup transmission mode - SAN.

Step 12: “Use multiple upload streams per job” is another important parameter that has a direct impact on the overall backup performance. Veeam QNAP uses multi-thread data transfer for each session of the backup job. All you have to do is to navigate to “Settings,” and click on “Network Traffic Rules.” Then, choose “Use multiple upload streams per job.” It is always better to set it to a digit above 10, as shown below.

Similarly, you can also back up disks, files, and VMware datastore to NAS with QNAP Veeam Backup & Replication.
More Related: Veeam NAS Backup and Recovery
Part 4. Best Alternative to Veeam
If Veeam doesn't meet your need, you can try Wondershare UBackit to backup files to NAS. UBackit is the best alternative to Veeam that enables you to backup or transfer any type of files from NAS to another disk, or from any place to NAS server. Not only this but UBackit File Backup tool also provides backup schedule to help you backup files automatically.
How to Use UBackit NAS Data Backup?
Step 1. Launch UBackit and go to Backup section from the sidebar. Then click File Backup to create a new backup task.

Step 2. Now select the files. You can find the target files quickly using the Filter option at the top right corner. Then tap Select to continue.
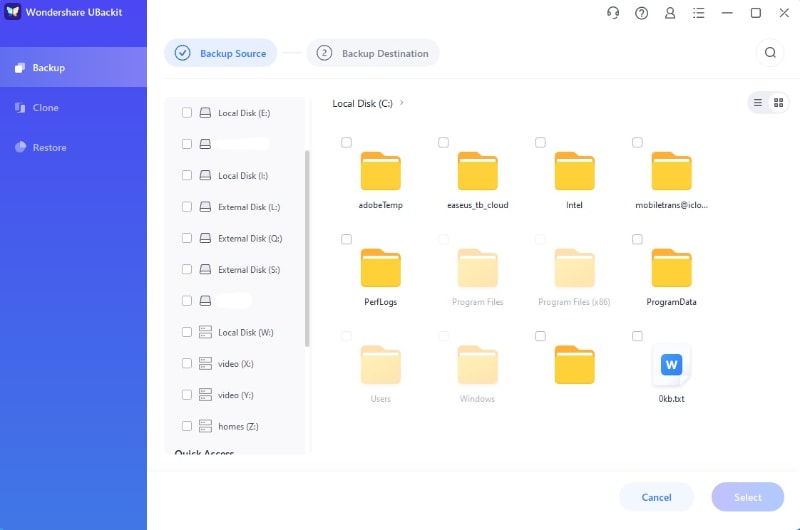
Step 3. After that, select the disk where you want to save the backup files. To backup files to NAS Server, you need to select the target NAS Server as the backup destination here. Then click Select to get the backup process started.

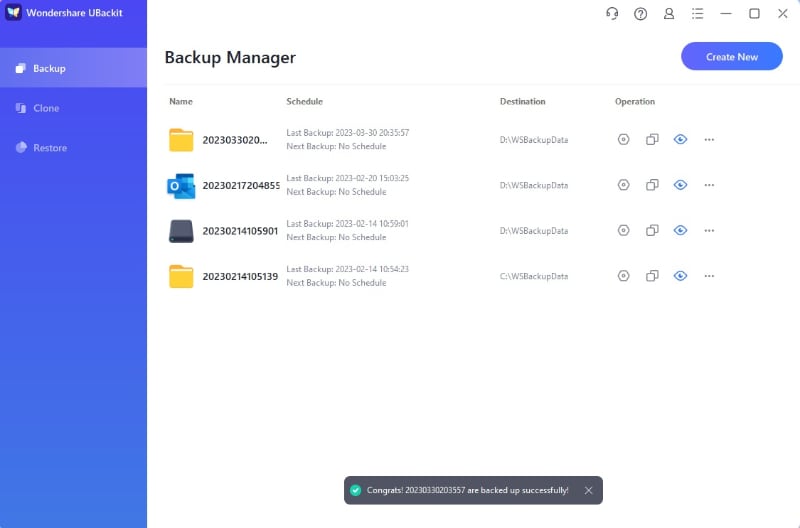
Step 4. Once the process completes, click the Setting icon on the backup file and set an automatic backup plan as your need. It provides daily, weekly, monthly and real-time automatic backup.
Part 5. Lost Files from Your QNAP NAS? Here’s How You Can Recover Them
Losing important files from QNAP NAS all of a sudden indeed creates an irritating situation. No one of us ever wants to experience this scenario. But what if you have to deal with it one day or the other? You must be aware of how to proceed and what to do if this happens to you. Are you concerned about the same? If yes, Wondershare Recoverit is your one-stop backup solution.
Now, the question coming to your mind would possibly be: why should you even try Recoverit? Right? Well, just think about the first thing you will consider on top when choosing a NAS data recovery. What would that be?
It will surely be nothing but the data recovery rate. Isn’t it? This is where Recoverit wins the battle because it is designed to ensure a 95% recovery rate - the highest of all as of writing this guide. This is the major reason why more than 50 million users worldwide have trusted this software for protecting their data from losing.
How to Use Recoverit to Get Your Lost/Deleted QNAP NAS Files Back?
The 9 easy steps to restore your lost data from the NAS server are listed below.
Step 1: Download Recoverit and install the program by following the given instructions.
For Windows Vista/7/8/10/11
For macOS X 10.10 - macOS 13
Step 2: As soon as the installation is completed, open the tool and go to the option, “NAS and Linux.”
Step 3: Now, tap on “NAS Recovery.”

Step 4: After the above step, the program will find the detectable NAS devices. You can easily find them under “NAS Servers.”
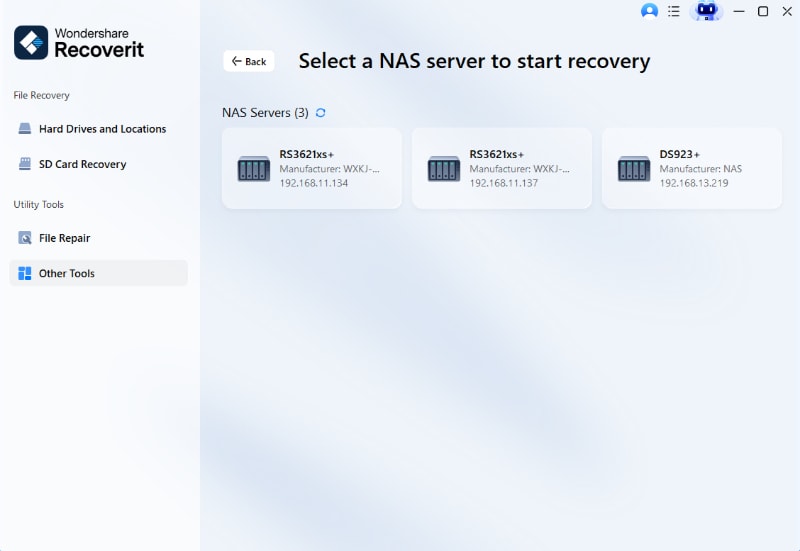
Step 5: It is time to select the device that has the lost or deleted NAS files.
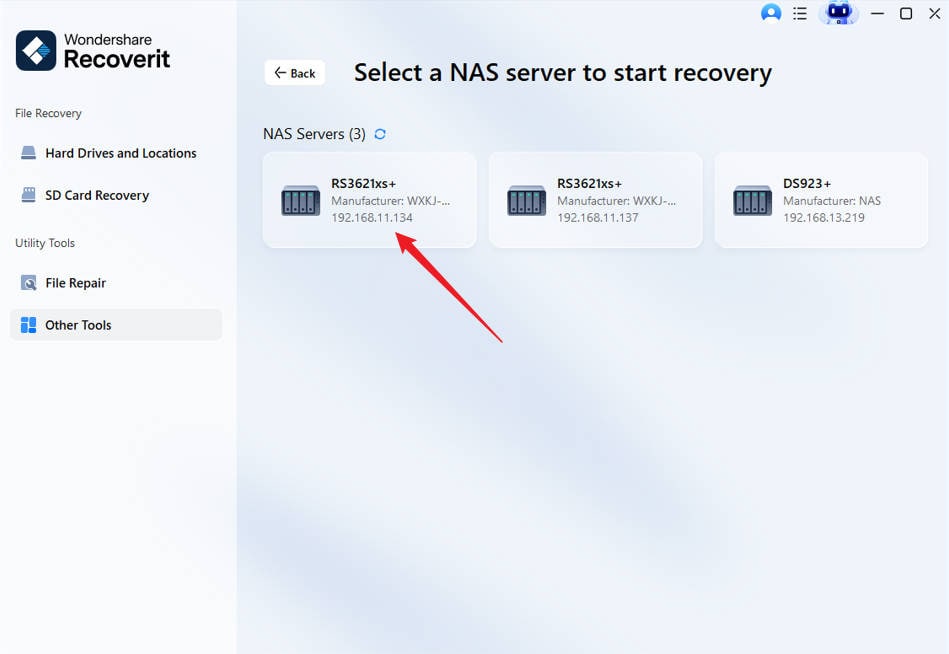
Step 6: Now, Recoverit will ask you to provide some information to create a remote connection to connect the NAS device successfully. For this, tap on “Connect.”
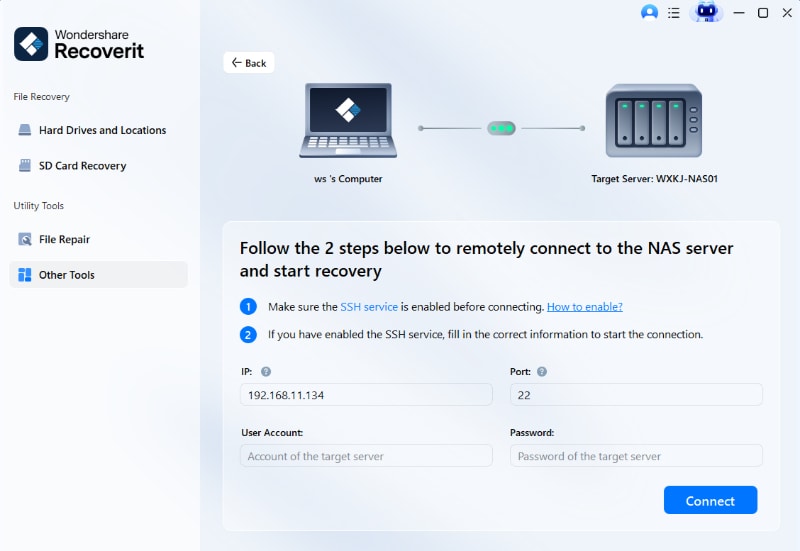
Step 7: After creating a remote connection, this tool will initiate an automatic searching for the lost files from the selected NAS device. To monitor the scanning progress, look at the bottom of the tool’s screen.
One of the good features of Recoverit is that you can stop or pause the scanning process at any time of your choice. Once you find the right file, you are free to stop this process even before it is completed.

Step 8: Now, you can use the preview feature to ensure you have found the right data file. Then, tap on “Recover” to get it back on your system.

Step 9: This time, the software will ask you to choose a particular path to save your recovered data from NAS. Always make sure you choose a different path from the earlier one (where you lost your important stuff).

Video Tutorial on How to Recover Files from NAS Server?
For Windows Vista/7/8/10/11
For macOS X 10.10 - macOS 13
Frequently Asked Questions (FAQs)
Which technology does Veeam use to create incremental NAS data backup?
Well, this unique technology is named after “Changed File Tracking.” It allows you to efficiently achieve your backup goals by creating fast incremental backups.
Acronis vs. Veeam? Which one is better?
If we talk about the robustness and easy deployment, Acronis is more efficient compared to today’s topic of discussion - Veeam Backup & Replication.
What are the top backup solutions that compete with Veeam?
At the moment, the biggest Veeam competitors are Rewind, HYCU, and Datto. All these tools are equally good and are continuously upgrading their functionalities to meet the recent demands of the market.
Where does Veeam store data?
It stores a variety of data (e.g., job sessions, backup infrastructure, etc.) on a Microsoft SQL Server database.
Which backup method does QNAP Veeam use?
To create safe backups for NAS devices, a popular protocol, Network Data Management Protocol (NDMP), was created.
How many types of backups does Veeam support?
It offers great support for three backup types, including incremental backups, forward incremental backups, and forever forward incremental backups.
Where should I store Veeam backups?
It is always recommended to store your backups in any external device, like a shared network folder or USB flash drive.
Does Veeam perform cloud-based backups?
Yes, the backups in Veeam Backup & Replication are cloud-based. In fact, it is considered the number 1 tool for providing hybrid solutions for cloud backups. As a result, you get complete ownership of the data regardless of the environment you use to create backups.
The Wrap-Up
Veeam QNAP is an excellent backup solution that provides you with one-of-its-kind, effective technology to back up your NAS in a short span. With the decent advancements in technology, you can now get a Veeam One from Veeam Availability Suite to protect your data from ransomware. If you want to give this software a try, go through the step-by-step guide presented in the above discussion.
Another leading challenge is to recover files from the NAS server once they are lost or deleted either accidentally or due to any other problem like a virus attack or hardware failure. This is where Wondershare Recoverit lends a helping hand to assist you in getting out of trouble in a matter of minutes.
With secure and efficient data recovery techniques and a 95% recovery rate, Recoverit has successfully gained the trust of over 50 million people from around the world.
For Windows Vista/7/8/10/11
For macOS X 10.10 - macOS 13

