How to Use Windows Server Backup?

Jun 29, 2023 • Filed to: Take Data Backup • Proven solutions
You are working on your computer, and suddenly your system crashes? How will you restore Windows now? Windows server backup can help now. If you are not well-versed with it, then read on to learn about how to use Windows server backup, how to backup, install, schedule backup, and restore files.
- Part 1: Overview of Windows Server Backup
- Part 2: How Can You Install Windows Server Backup?
- Part 3: How to Backup with Windows Server Backup?
- Part 4: How to Schedule Backup on Windows Server Backup?
- Part 5: Can You Restore Files from Windows Server Backup?
- Part 6: Windows Server Backup VS Wondershare UBackit
Part 1: Overview of Windows Server Backup
Due to unexpected circumstances like virus attack, accidental deletion, and corruption of files, you sometimes lose your important files. When this happens, you look for a way to restore files. But Windows server backup can restore files.
This in-built tool gives you the option to backup and restore in a Windows server environment. You can use it to take the backup of the specific folders or files or full server.
Part 2: How Can You Install Windows Server Backup?
Install Windows server backup command helps you to install it with the following easy steps:
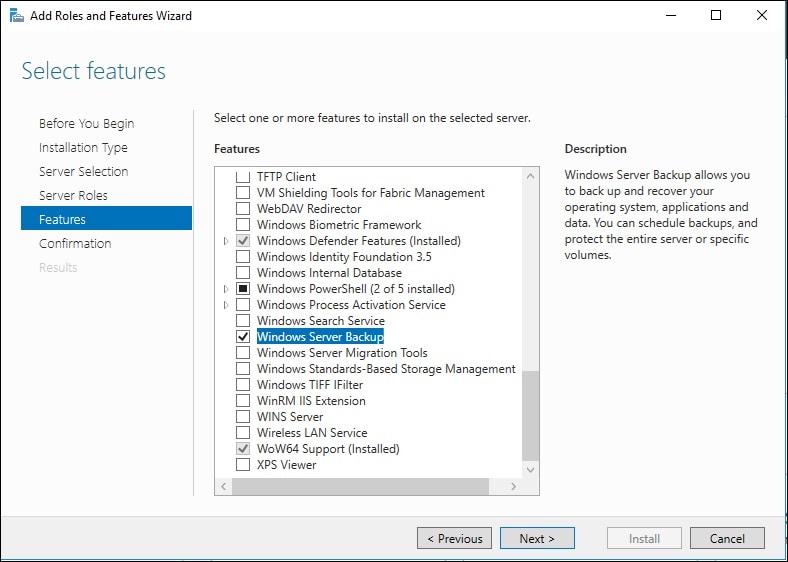
Step 1: Open Server Manager and select features. From the right-panel, now tap on the “add” features.
Step 2: Now click on “Next” after selecting the option “Windows Server Backup.”
Step 3: Click on “Install” and wait till it installs on your system.
As you have now successfully installed the Windows server backup, not let us see how to take the backup with it.
Part 3: How to Backup with Windows Server Backup?
Here are detailed steps about how to use windows server backup. Following them will help you take the backup without any issue.
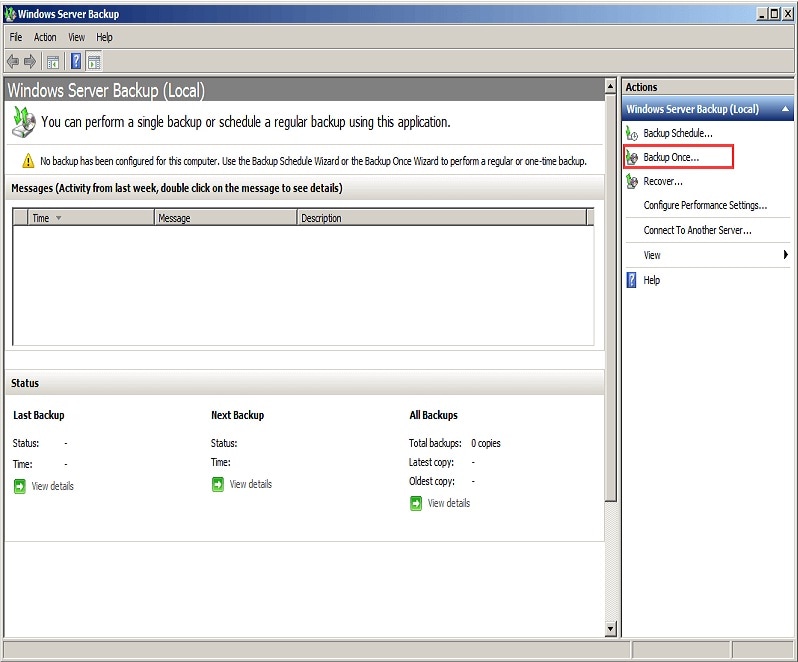
Step 1: Open “Run” and type wbadmin.msc
Step 2: Press on “OK” and then select “Backup Once Wizard.”
Step 3: In the backup options, select “Different option,” and then click on “Next.”
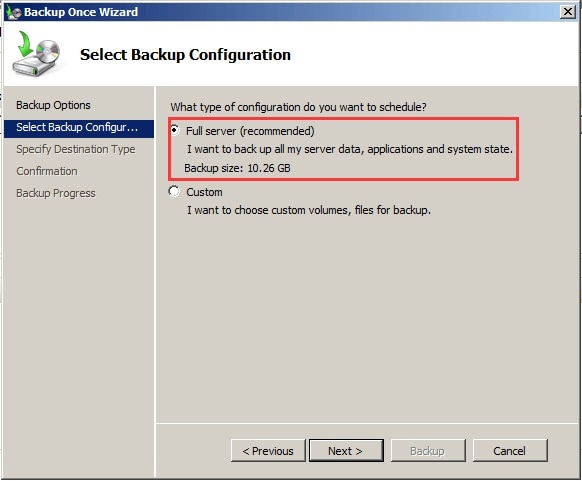
Step 4: Go to “Backup configuration” and select “full server backup.” If you select the custom, you should choose the volume shadow copy backup type you wanted to create.
Step 5: Select the location where you wish to save your backups. Now click on “Next.” If you select any shared folder, then enter its address. However, if you select any local drive, then select the volume.
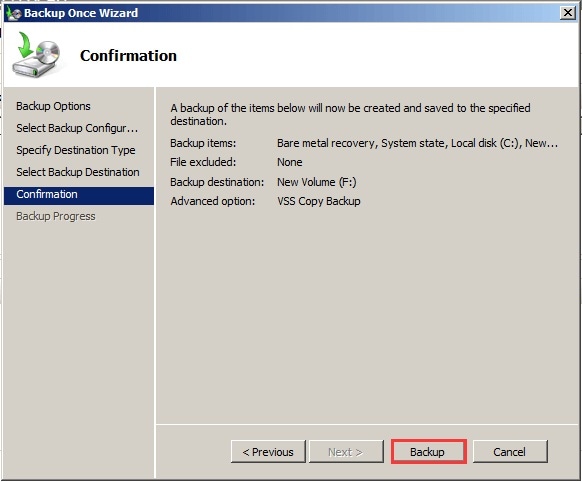
Step 6: Once you select the source and destination, confirm the settings and click on “Backup.” With this, Windows Server backup starts.
For improved protection, you can even schedule Windows Server backup. This will prevent you from losing any data if you fail to take the backup manually.
So, let us see how to schedule backup.
Part 4: How to Schedule Backup on Windows Server Backup?
If the backup is scheduled, you won’t bother to take the backup manually. Windows Server Backup will automatically initiate and save it to the desired location.
Here are the detailed steps for you:
Step 1: Open Windows Server backup and click on “Next” after selecting the option “Backup Schedule Wizard.”
Step 2: Select schedule backup configuration and then tap on any of the options – custom or full server, and click on “Next.”
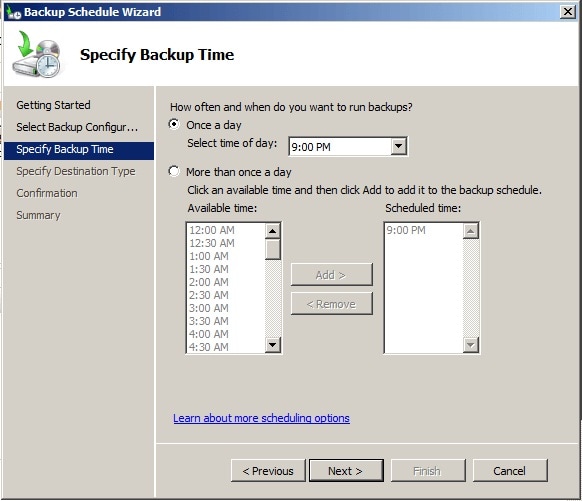
Step 3: Now, to set a schedule, you need to choose how often or at what intervals you wish to take backup.
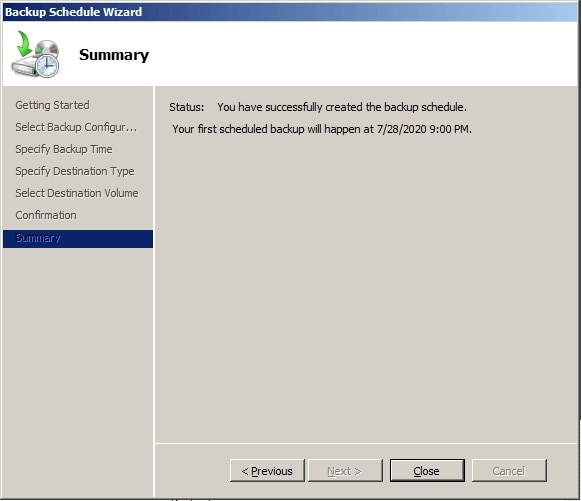
Step 4: After selecting the schedule, you need to select the destination to save your backup. Once you make the selection, click on “Next” and then on “Finish.”
Step 5: Windows Server Backup will begin to take a backup at your set schedule. When the backup process completes, exit the wizard by clicking on “Close.”
With this step, your schedule backup completes, but how to restore Windows Server Backup? Check it out in the next section.
Part 5: Can You Restore Files from Windows Server Backup?
Taking backup manually or through scheduled backup will help you keep a copy of your data. But how can you restore this copy if you lose some of your data accidentally from your system? Here are the steps for you:
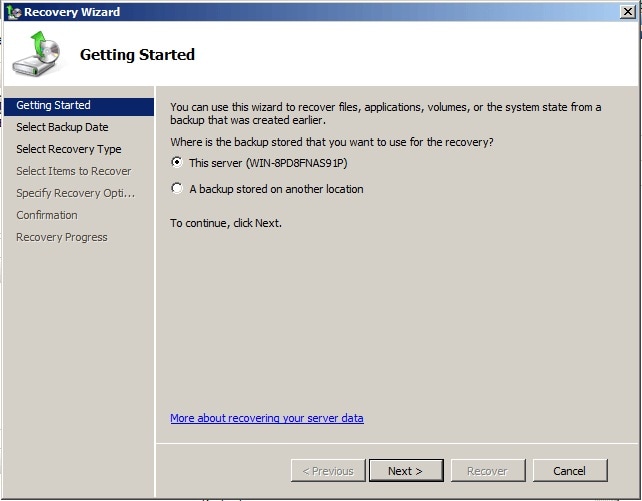
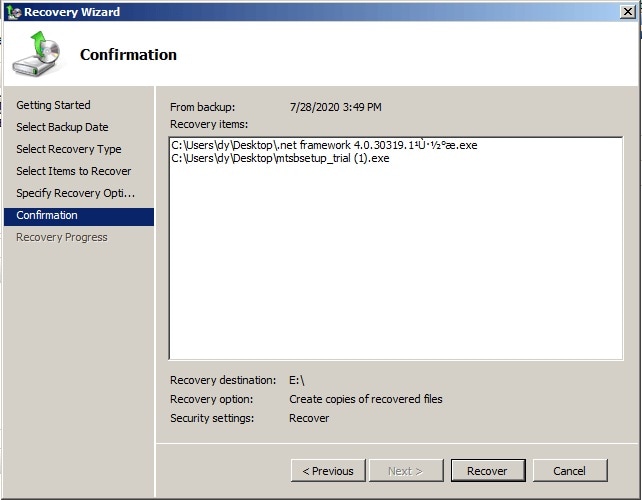
Step 1: Go to Windows Server Backup and select “Recovery Wizard.”
Step 2: Now select any of the saved backups for recovery. If the backup is on another location, you can select – backup stored on another location. Then click on “Next.” You can select the required backup by going through the backup date or time and again click on “Next.”
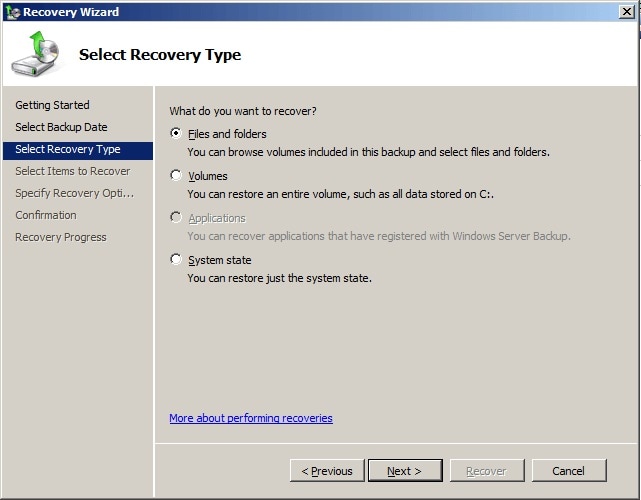
Step 3: Select whether you need to restore the entire volume or folders or files.
Step 4: Select one or more items to restore and then select the destination where you need the files to restore. Then click on “Recover” to begin the restoration process.
Part 6: Windows Server Backup VS Wondershare UBackit
Wondershare UBackit is an alternative to Windows Server Backup. This professional and user-friendly software is a perfect way to take the backup of your entire system file. Undoubtedly both the tools are used to take the backup, but every tool comes with its similarities and dissimilarities.
Take a look!
Similarities
- Both the software can schedule backup and restore it.
- Both allow you to take the backup of specific files and folders or the complete server.
Dissimilarities
- When taking the backup via Wondershare UBackit, you can save it to the USB drive. Whereas Windows Server Backup might not allow you to do so.
- Wondershare UBackit gives you more backup features in comparison to Windows Server Backup.
Conclusion
Data loss can happen anytime, but Windows Server Backup can help you get back your lost data. We have discussed how to use Windows server backup in the above guide. However, if you are looking for some other application to take the backup of your files and folders, we recommend using Wondershare UBackit.
Data Backup Services
- Computer Backup
- Windows 10 Backup
- Windows 8 Backup
- Best File Sync Software
- Driver Backup
- SD Card Backup
- Best Incremental Backup
- Onedrive Automatic Backup
- Hard Drive Backup
- CMD Backup
- External Hard Drive Backup
- Hard Drive Backup Software
- Move Files from C Drive to D Drive
- Best Backup Hard Drive
- Mac Backup
- Cloud Backup


Amy Dennis
staff Editor