How to Backup Windows 10 to QNAP NAS
Backing up information is one of the most important tasks for any user, who can have a very high number of files on their computer. A NAS is one of the most reliable devices, due to its very high storage capacity and its practicality. QNAP NAS is the most common option due to its very well developed operating system and the quality of the components. If you wonder if you can make backups of your Windows 10 on a QNAP NAS, the answer is completely affirmative and here I will show you how to easily carry out this process.
Part 1: Methods to Back Up Windows 10 to QNAP NAS
Q: I have been using a QNAP NAS and it is very useful, however, I want to back up my Windows 10. Is there an easy way to do it?
Currently, storage methods have diversified, as more and more information is gradually being worked on and users are increasingly concerned that it is backed up, secure, and has access to it whenever they require it. The most common method is that the files are stored on external hard drives since they are devices that are easily accessible and affordable, but their problem is that their capacity is not so high and that they are quite fragile; therefore, progressively more attractive, diverse and practical options have been implemented for those who have many Gigabytes or even Terabytes of files.
Although file hosting systems or storage clouds have become very popular, NAS has emerged as a very popular option because they are very reliable and are devices that can be configured according to the needs of users and have several very useful features. Today there are many types of NAS and most of them have considerable advantages, but without a doubt, QNAP is one of the most attractive options, since they are at the forefront, are fully updated, and work with a very intuitive operating system.
Part 2: Overview of QNAP NAS
QNAP NAS works like any other NAS, being a device that becomes a central storage system with multiple hard drives, which is always online and can be accessed from any computer or mobile device that is synchronized.
Thanks to NAS, users can access their files backed up from any synchronized computer, so all the information will be in one place. In addition to this, backups and synchronizations can be made whenever required.
QNAP is a corporation that has specialized in developing NAS and has added many advantages through its operating system (QTS), below I will mention some of them:
Ease of file sharing: QTS offers various ways to share information. This operating system is implemented so that you can share attachments in your email, web page links, videos, photos, and music folders in a very easy and comfortable way.
Effective protection for your data: Every QNAP NAS has mechanized protection systems to keep all your content as safe as possible. Some examples of security are two-step verification, encryption of volumes, and encryption of shared folders, as well as instant alerts to mobile devices. This makes you aware of the use of your QNAP NAS and that you are notified at all times if someone is using it. This represents a lot of confidence and security to prevent a bad use of your device and its information.
Effective content streaming: Having a QNAP NAS represents having a multimedia center at home or work. Through compatible devices and thanks to the QTS operating system, multimedia content can be streamed, which can be very useful and you will not need other additional devices to do so.
Quickly find any file using QSirch: Sometimes we need to look for a file that we don't know where it is. Although this task can be done manually in Windows, this process can take a long time and is not necessarily effective. Thanks to the QSirch application, you will be able to find any file or document in seconds thanks to its intelligent predictive search system.
File sharing between platforms for group collaboration: QTS supports backing up information from many operating systems, this means that users who make use of Windows, Mac, Linux, and even mobile operating systems like Android and iOS can work together without any restrictions.
Use QNAP NAS as a PC: Thanks to QvPC technology, you can turn your QNAP NAS into a PC. You only need to connect a mouse and a monitor and you will be able to access various features as well as your files. There are multimedia applications in QTS that you can access and you can even browse the web to search for any type of information or news.
Download dozens of apps that fit your needs: QTS App Center contains more than one hundred applications that can be very useful for the use of your NAS. There are security applications, streaming, file backup, information synchronization, technical support, office, antivirus, entertainment, programming, and many more. Downloading them is very easy and they are always kept constantly updated.
Part 3: How to Back Up Windows 10 to QNAP NAS?
If you want to backup Windows 10 to QNAP NAS, you can do it using the native Windows tool or through a professional software. Below I will show you how to do it in both ways.
1. Backing up with the Windows 10 inbuilt backup tool
Windows has a built-in tool (Backup and restore) that allows you to make backups of your operating system; below I will show you the steps so you know how to do it.
Step 1: Open Settings app
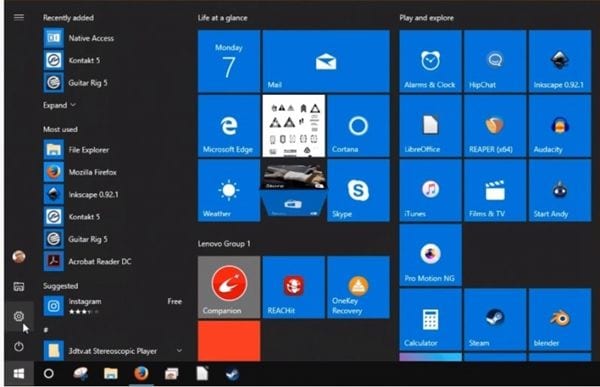
Open the Settings app by clicking on the Windows icon at the lower-left corner of the screen and then click on the gear icon to open the Settings app.
Step 2: Open "Update & security"
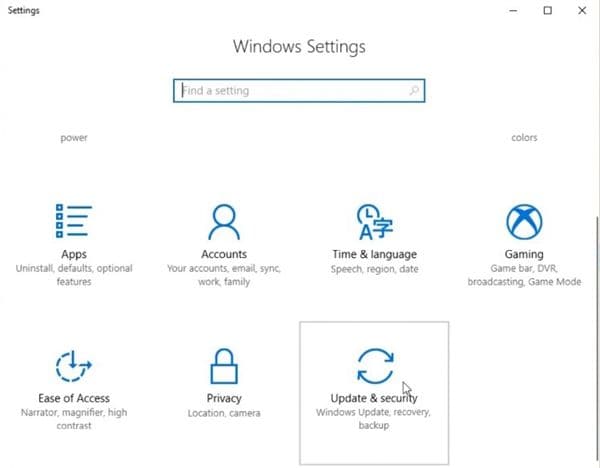
Once you have opened the Settings app, click on "Update & security."
Step 3: Open Backup and Restore
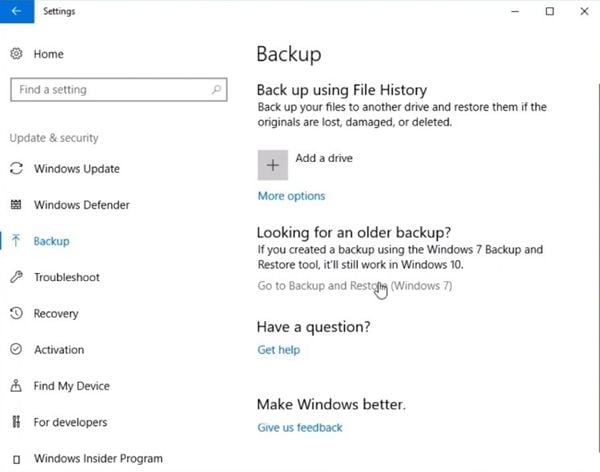
In the left menu, click on "Backup"; after that click on "Go to Backup and Restore (Windows 7).
Step 4: Start to set up your backup
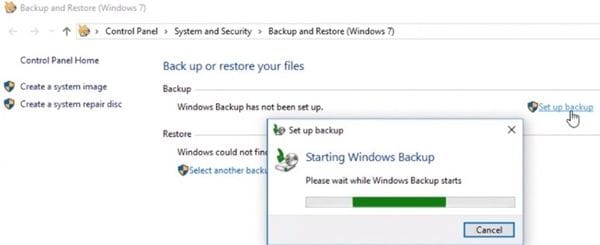
Click on "Set up backup", you have to wait for some seconds, then a new window will emerge.
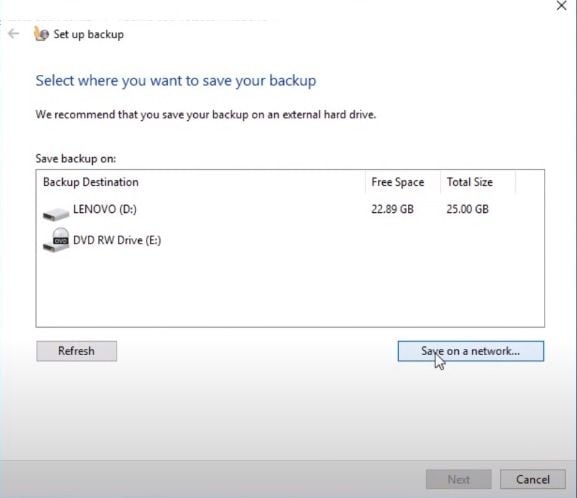
Step 5: Select a network location
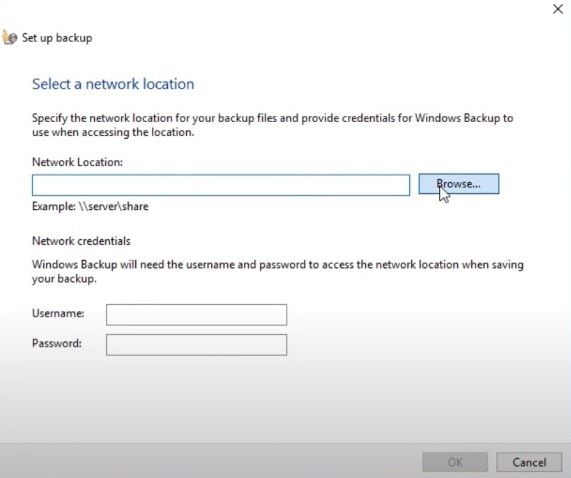
Click on "Browse" to select the network location where you want to back up Windows 10. In this case, you should select your QNAP NAS. Then write the username and password of the network location you chose.
Step 6: Select your backup destination
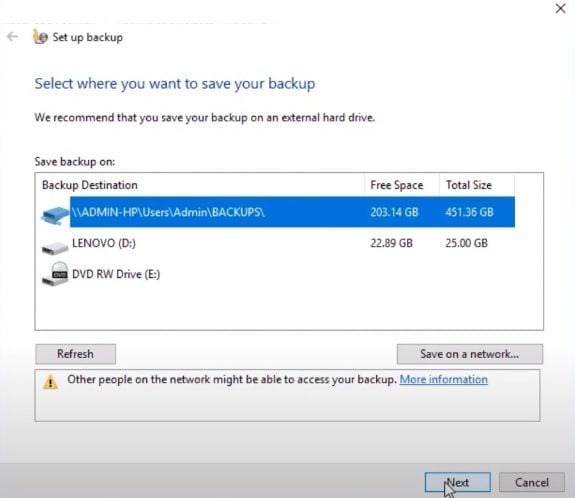
Select your backup destination (in this case the network location you selected). Just click on it and then click "Next." Then you may choose a full or custom backup.
Step 7: Start to backup
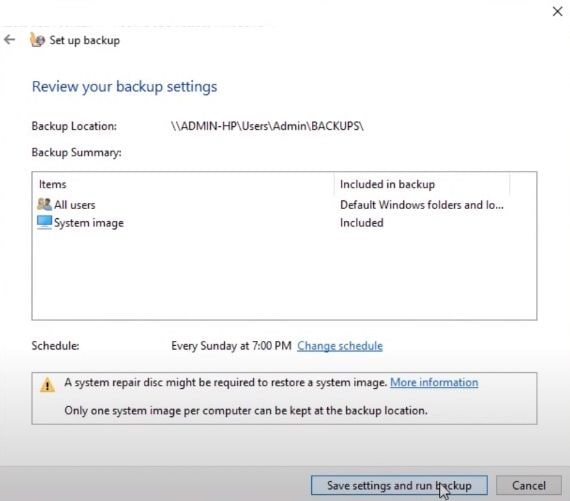
In this window, click on "Save settings and run backup." The Windows 10 backup will start immediately, this process may take some minutes. You just have to wait until it finishes.
2. Backup Windows 10 to QNAP NAS with UBackit Data Backup
The Windows 10 in-built tool meets the basic requirements for backing up your operating system, however, it may not be enough for your needs. Wondershare UBackit is specialized backup software, which has many functions like file backup, Outlook email backup, disk backup, disk clone, back schedule, etc. that can represent a greater advantage and comfort for users. Not only this but this program is also free to use for the first 30 days.
To backup Windows 10 to QNAP NAS using Wondershare UBackit, you only have to do the following:
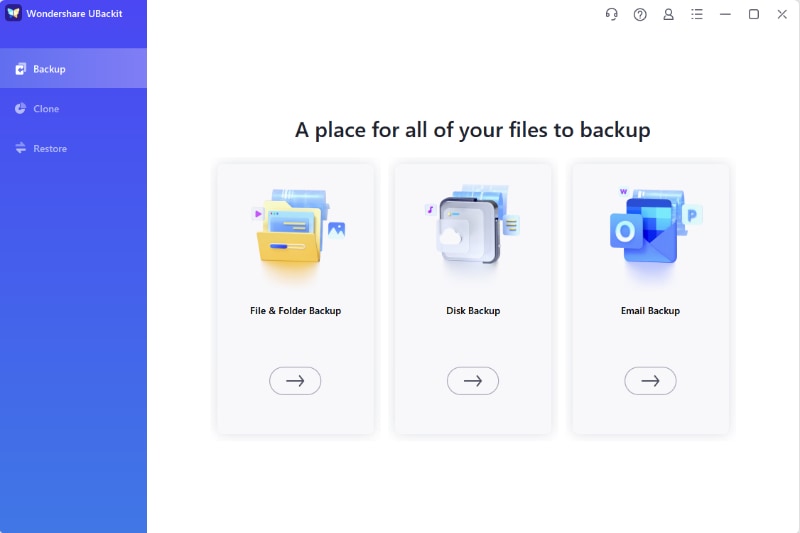
Step 1: Go to Backup
Click on "Backup" and select "File Backup" or "Disk Backup" as you need.
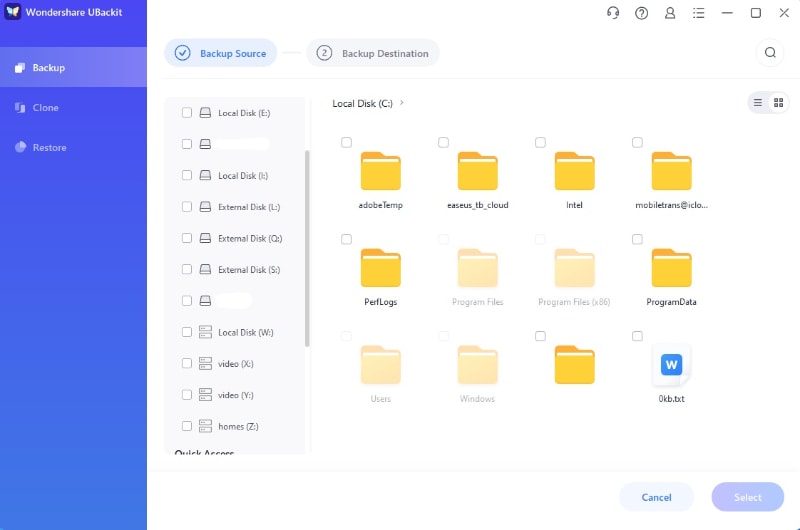
Step 2: Select Backup Files
In this case, choose the files or folders you want to backup. Then click Select to the next step.
Step 3: Select the Backup Destination
After that, select the NAS Server to save the backup files. Please confirm the server has connected to the computer and can be recognized successfully.
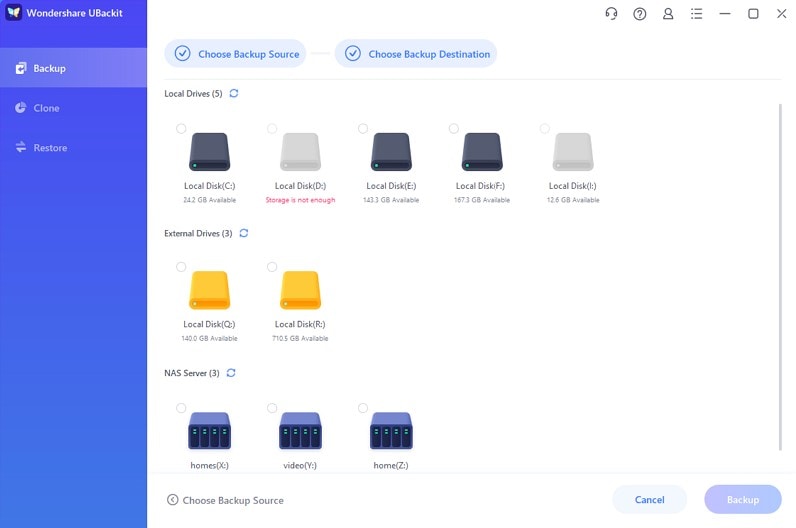
Step 4: Complete Backup Process
Click Select, then the backup process will get started. It will take several seconds or minutes to complete.
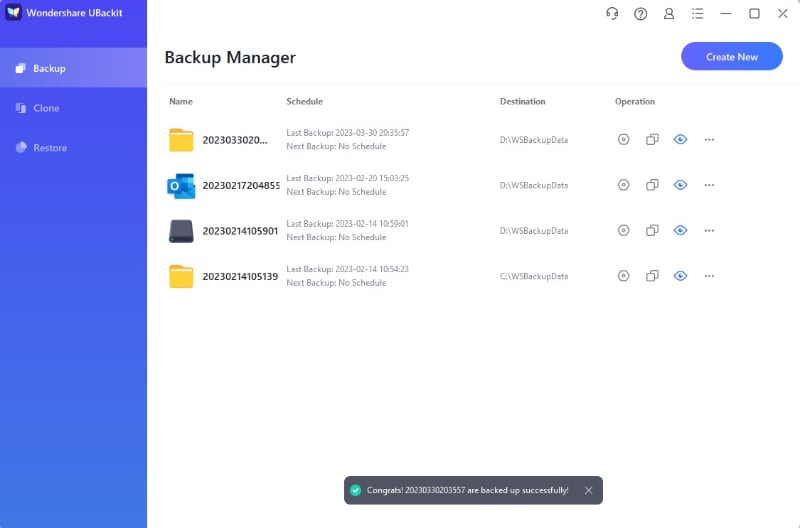
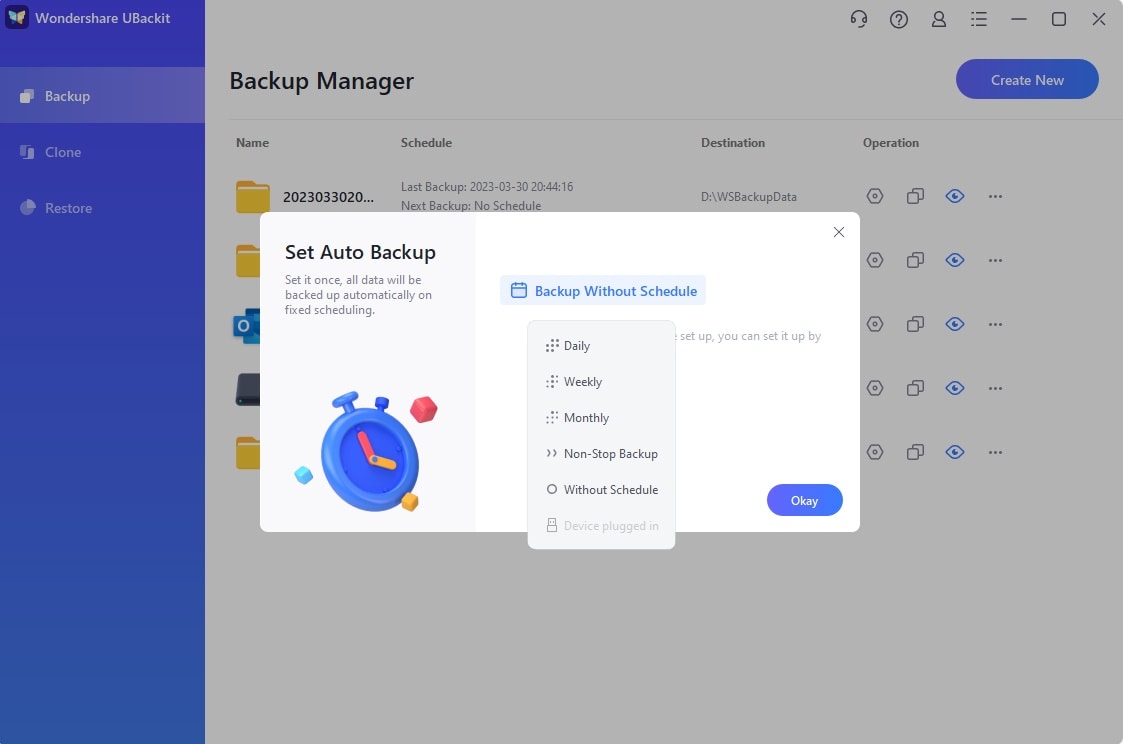
Step 5: NAS Backup Schedule
Once UBackit finished backup, you can preview the backup file, start a new backup, encrypt the back folder, or set a backup schedule to let the files be backed up automatically. You can set daily, weekly, monthly, or real-time backup by clicking the setting icon as the screenshot shows.
Conclusion
QNAP NAS is one of the best options on the market to make your backups in a very safe and practical way. This device has many functions that facilitate the backup process and automate it so that its users do not worry about the security of their information. These devices also allow the backup of your Windows 10 and doing it is quite practical. Although Backup and Restore is a useful tool to perform this task, UBackit Data Backup is an alternative that will give you more advantages and that will adjust to all your needs.
More Related:
QNAP Boxafe Review and the Best Alternative
QNAP Rsync vs. Syncthing
Acronis Cyber Protect Review
Data Backup Services
- Computer Backup
- Hard Drive Backup
- Mac Backup
- Cloud Backup


Amy Dennis
staff Editor